Configuring with RouterOS for Authentication
This a document is designed to help configure a RouterOS appliance to use the SNAPx Portal services. The RouterOS configuration needs to have a generic HotSpot configuration before proceeding.
First download the hotspot folder you would like to use.
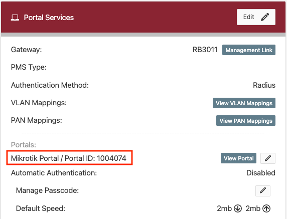
Log into SNAPx and proceed to the Portal you would like to use and capture the Portal ID.
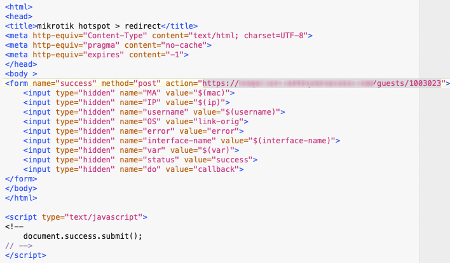
Go to the hotspot folder you downloaded and edit the alogin.html file.
In the file you will see the following section where you will need to change the url to https://[YOUR_DOMAIN]/guests/welcome/[portal_id]
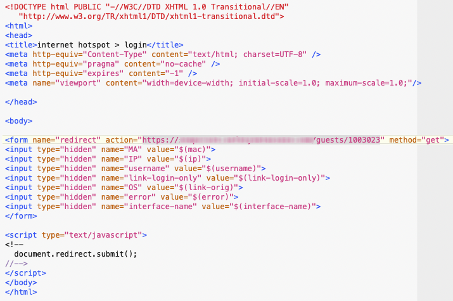
Now you must edit the login.html file.
Once both files are completed, you now need to upload them to the hotspot folder.
Run this command in a Terminal window:
/ip hotspot walled-garden ip
add action=accept disabled=no !dst-address !dst-address-list dst-host=[YOUR_DOMAIN] dst-port=443 \
protocol=tcp server=hotspot1 src-address=<HotSpot IP: xxx.xxx.xxx.xxx/xx>!src-address-list
You should now have an entry in the Walled Garden IP list for your HotSpot.
Open an New Terminal and enter this command:
/ip hotspot walled-garden

add dst-host=*.selectnetworx.com server=<HotSpot Name>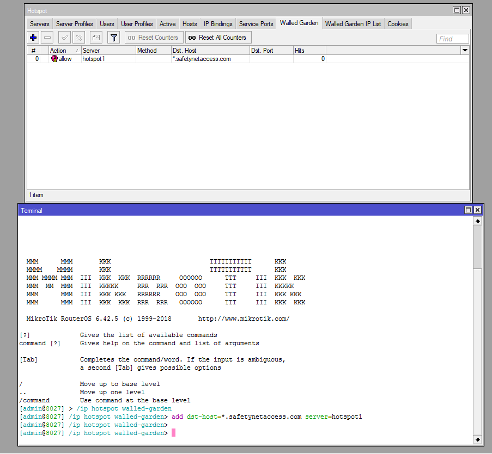
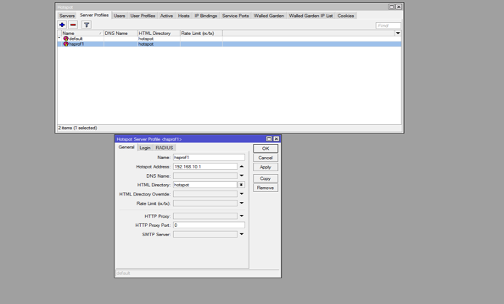
Under your HotSpot click on Server Profiles and click on the server that is not name "Default".
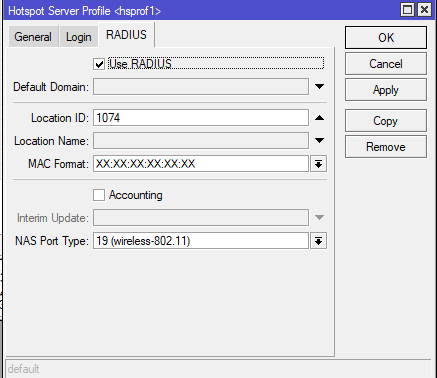
Click on the RADIUS tab. Select "Use Radius" and for Location ID set it to the SNAP Id.
Open a New Terminal and enter this command:
/radius
add address=<INGRESS IP> comment=SNA_AWS secret=<RADIUS SECRET> service=login,hotspot timeout=5s