Configuring Aruba Gateway in Central for Authentication
Overview
This document helps you configure SNAPx based captive portal authentication system and an Aruba gateway.
SNAPx Equipment Table Requirements
| Field | Value |
|---|---|
| Type | Gateway |
| Vendor | Aruba |
| Model | 9004 |
| IP Address | Public IP Address |
| SNMP IP Address | Private IP Address |
| Protocol | HTTPS |
| Username | default |
| Password | default |
| Status | Production |
Gateway/SNAPx Wireless Connectivity
There are 3 types of communication between the gateway and SNAPx:
- RADIUS authentication from the gateway
- RADIUS Accounting from the gateway
- XML from SNAPx to the gateway
This requires that the gateway be reachable from a static public IP address.
Aruba Gateway Configuration Overview
Auth Servers
Navigate to Security → Auth Servers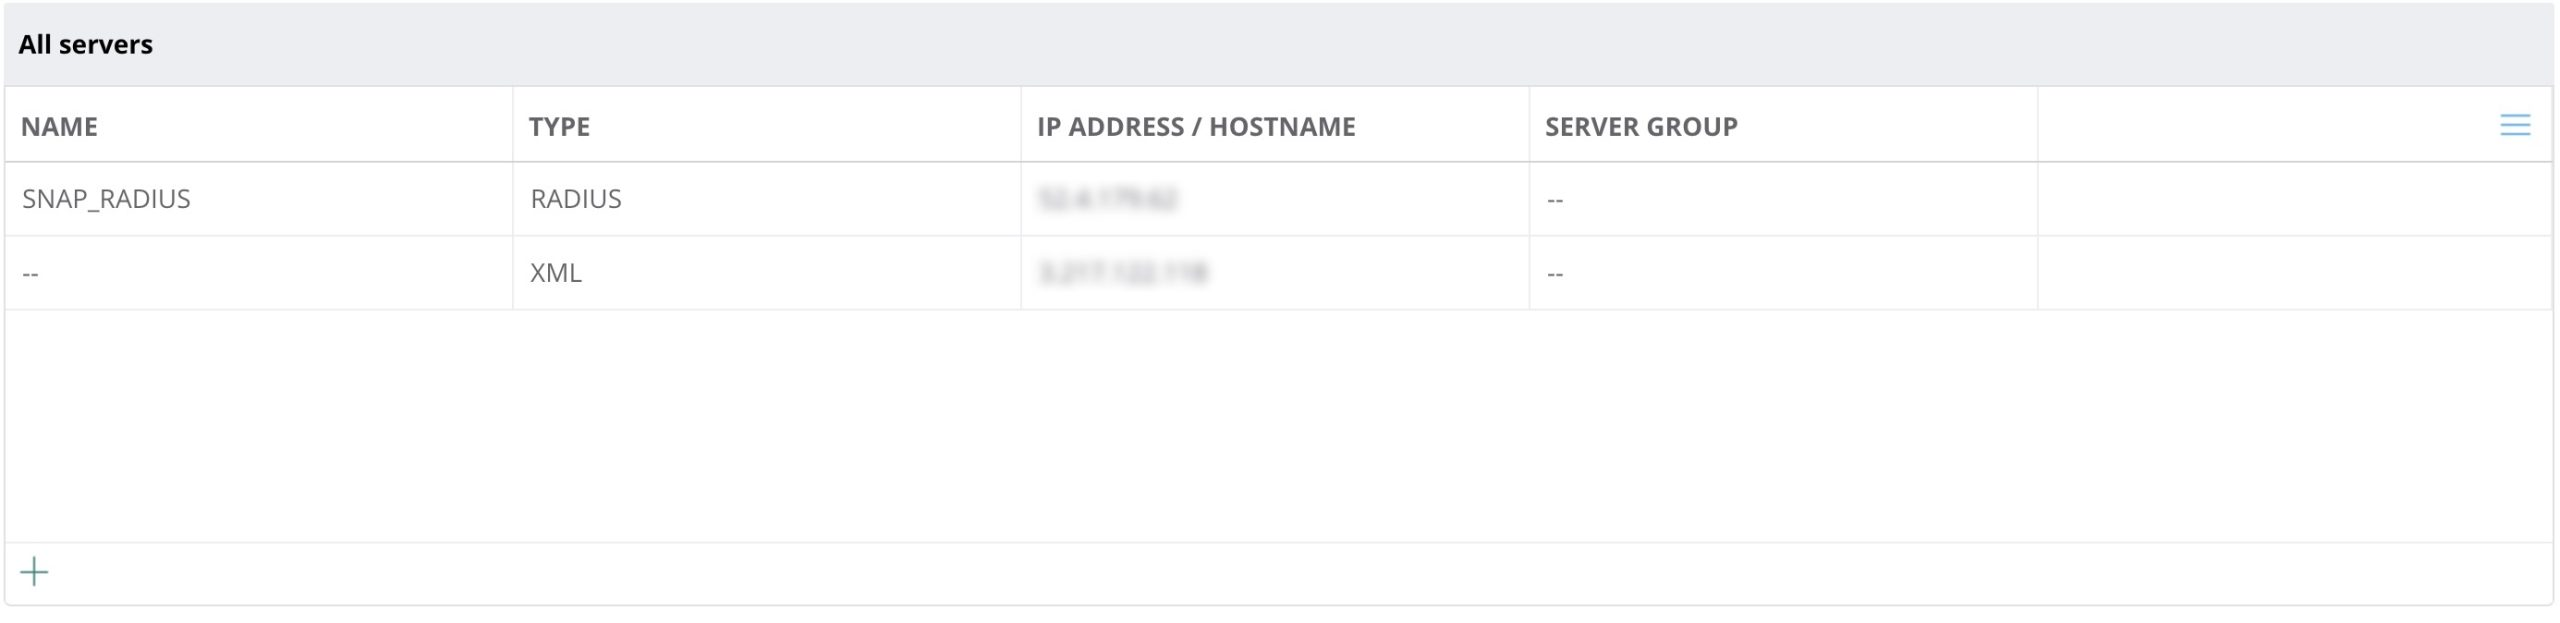
Ensure that you add the RADIUS and XML servers below. The RADIUS will be the Egress IP and the XML will be the Ingress IP. These values will be provided by your account representative.
SNAP_RADIUS
For SNAP_RADIUS ensure that you use the SNAP RADIUS key given to you and replicate the settings as shown. 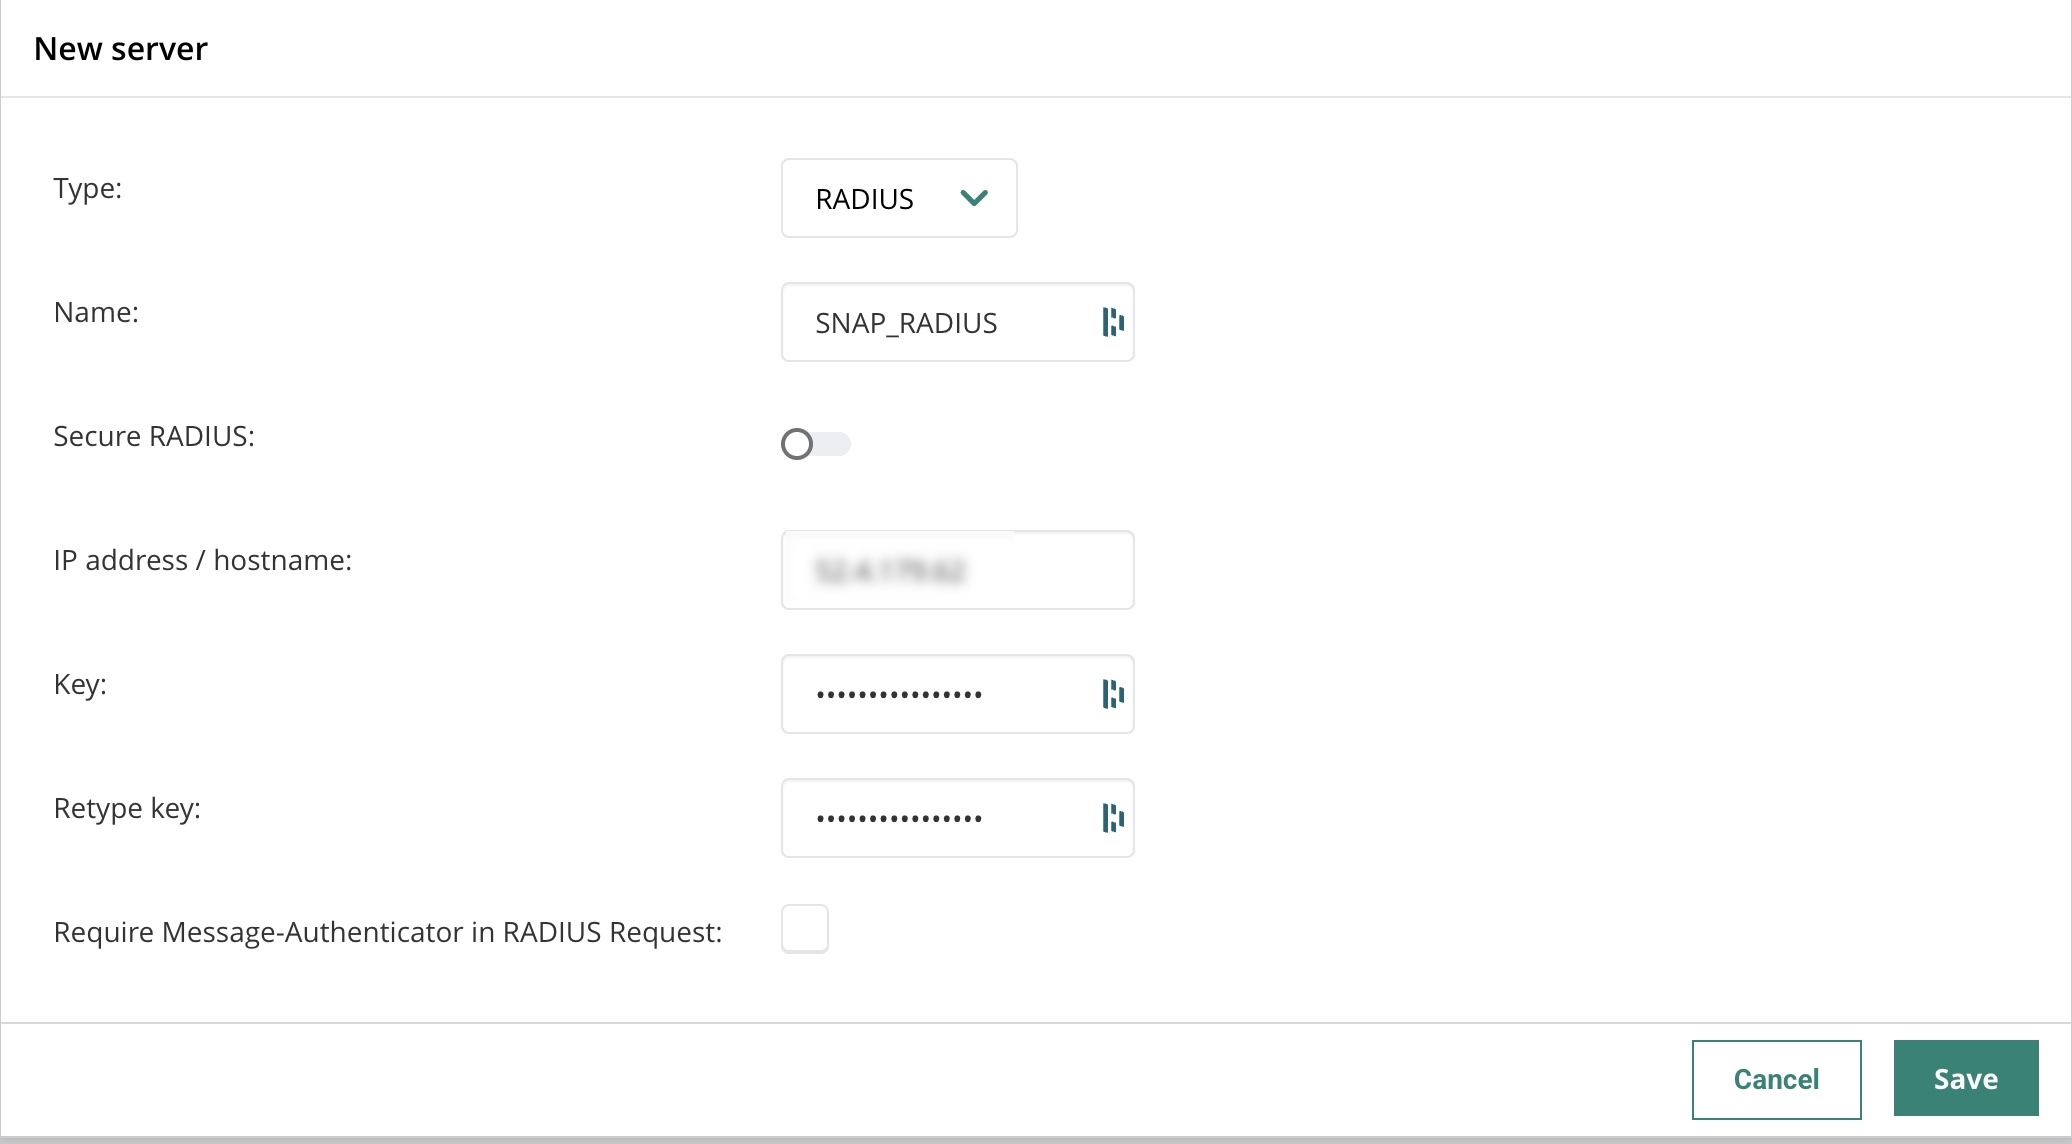
XML (Your Ingress IP)
The KEY should be aruba123 for all devices. 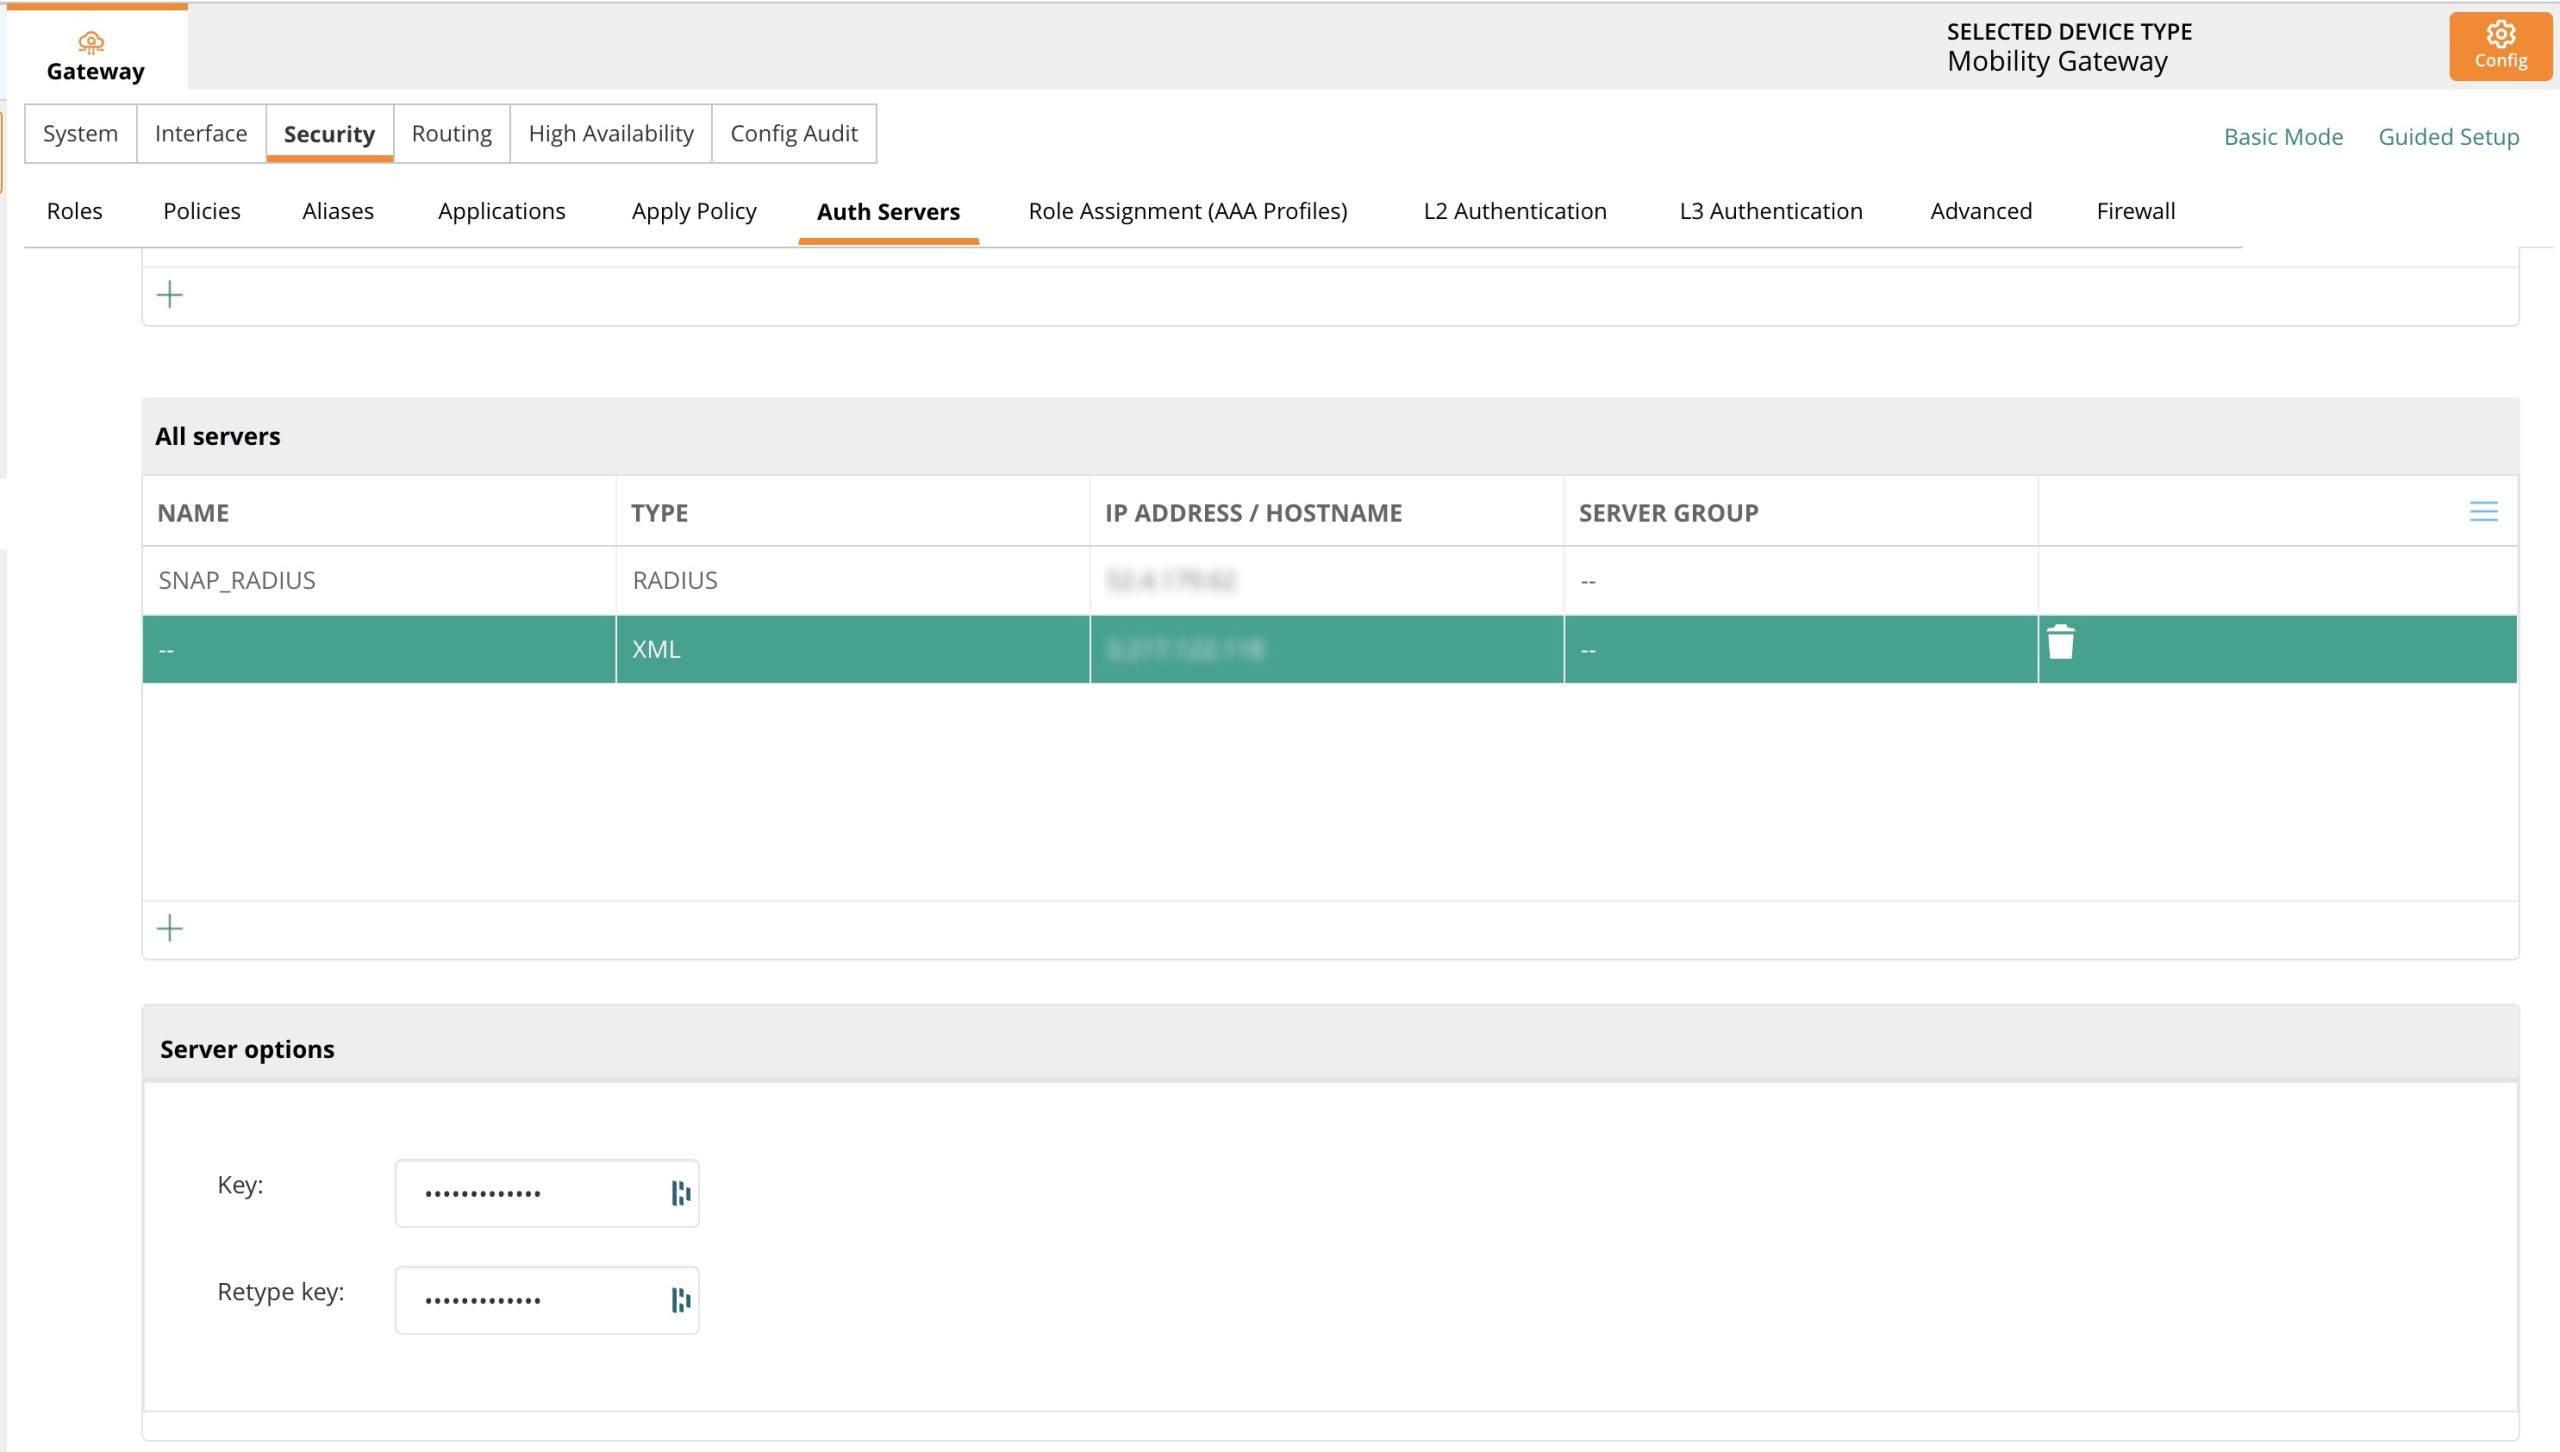
Create AAA Profile
Navigate to Security → Role Assignment → AAA Profiles List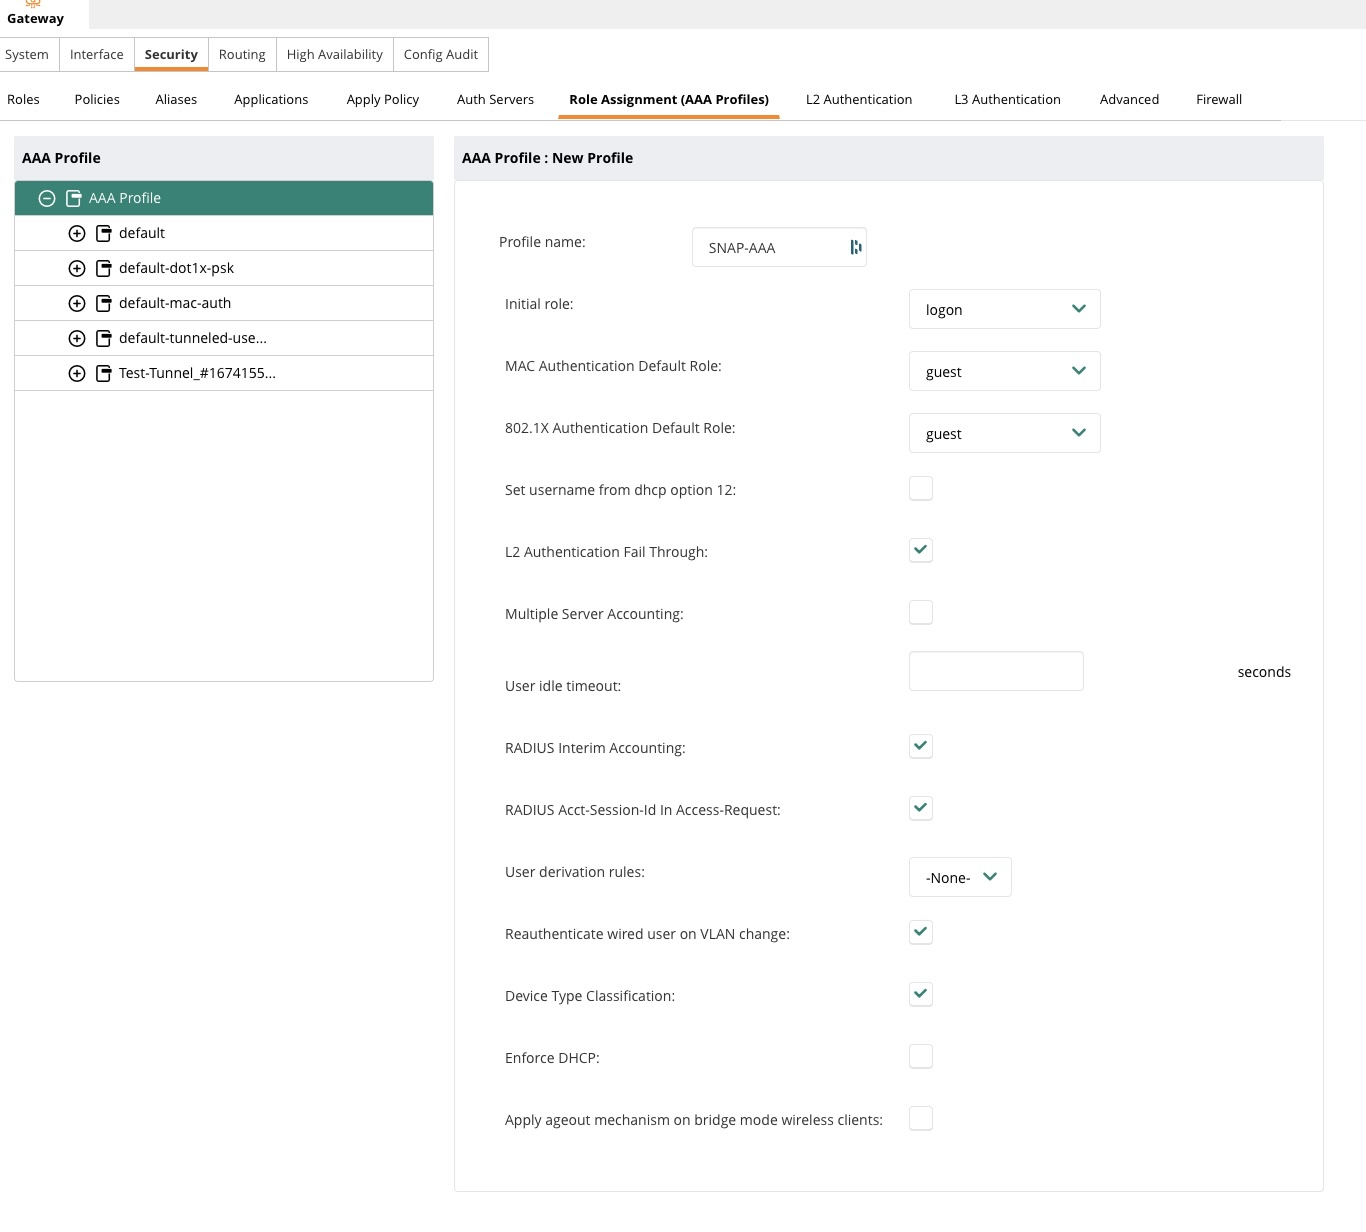
Create SNAP profile (must be named SNAP)
MAC Authentication
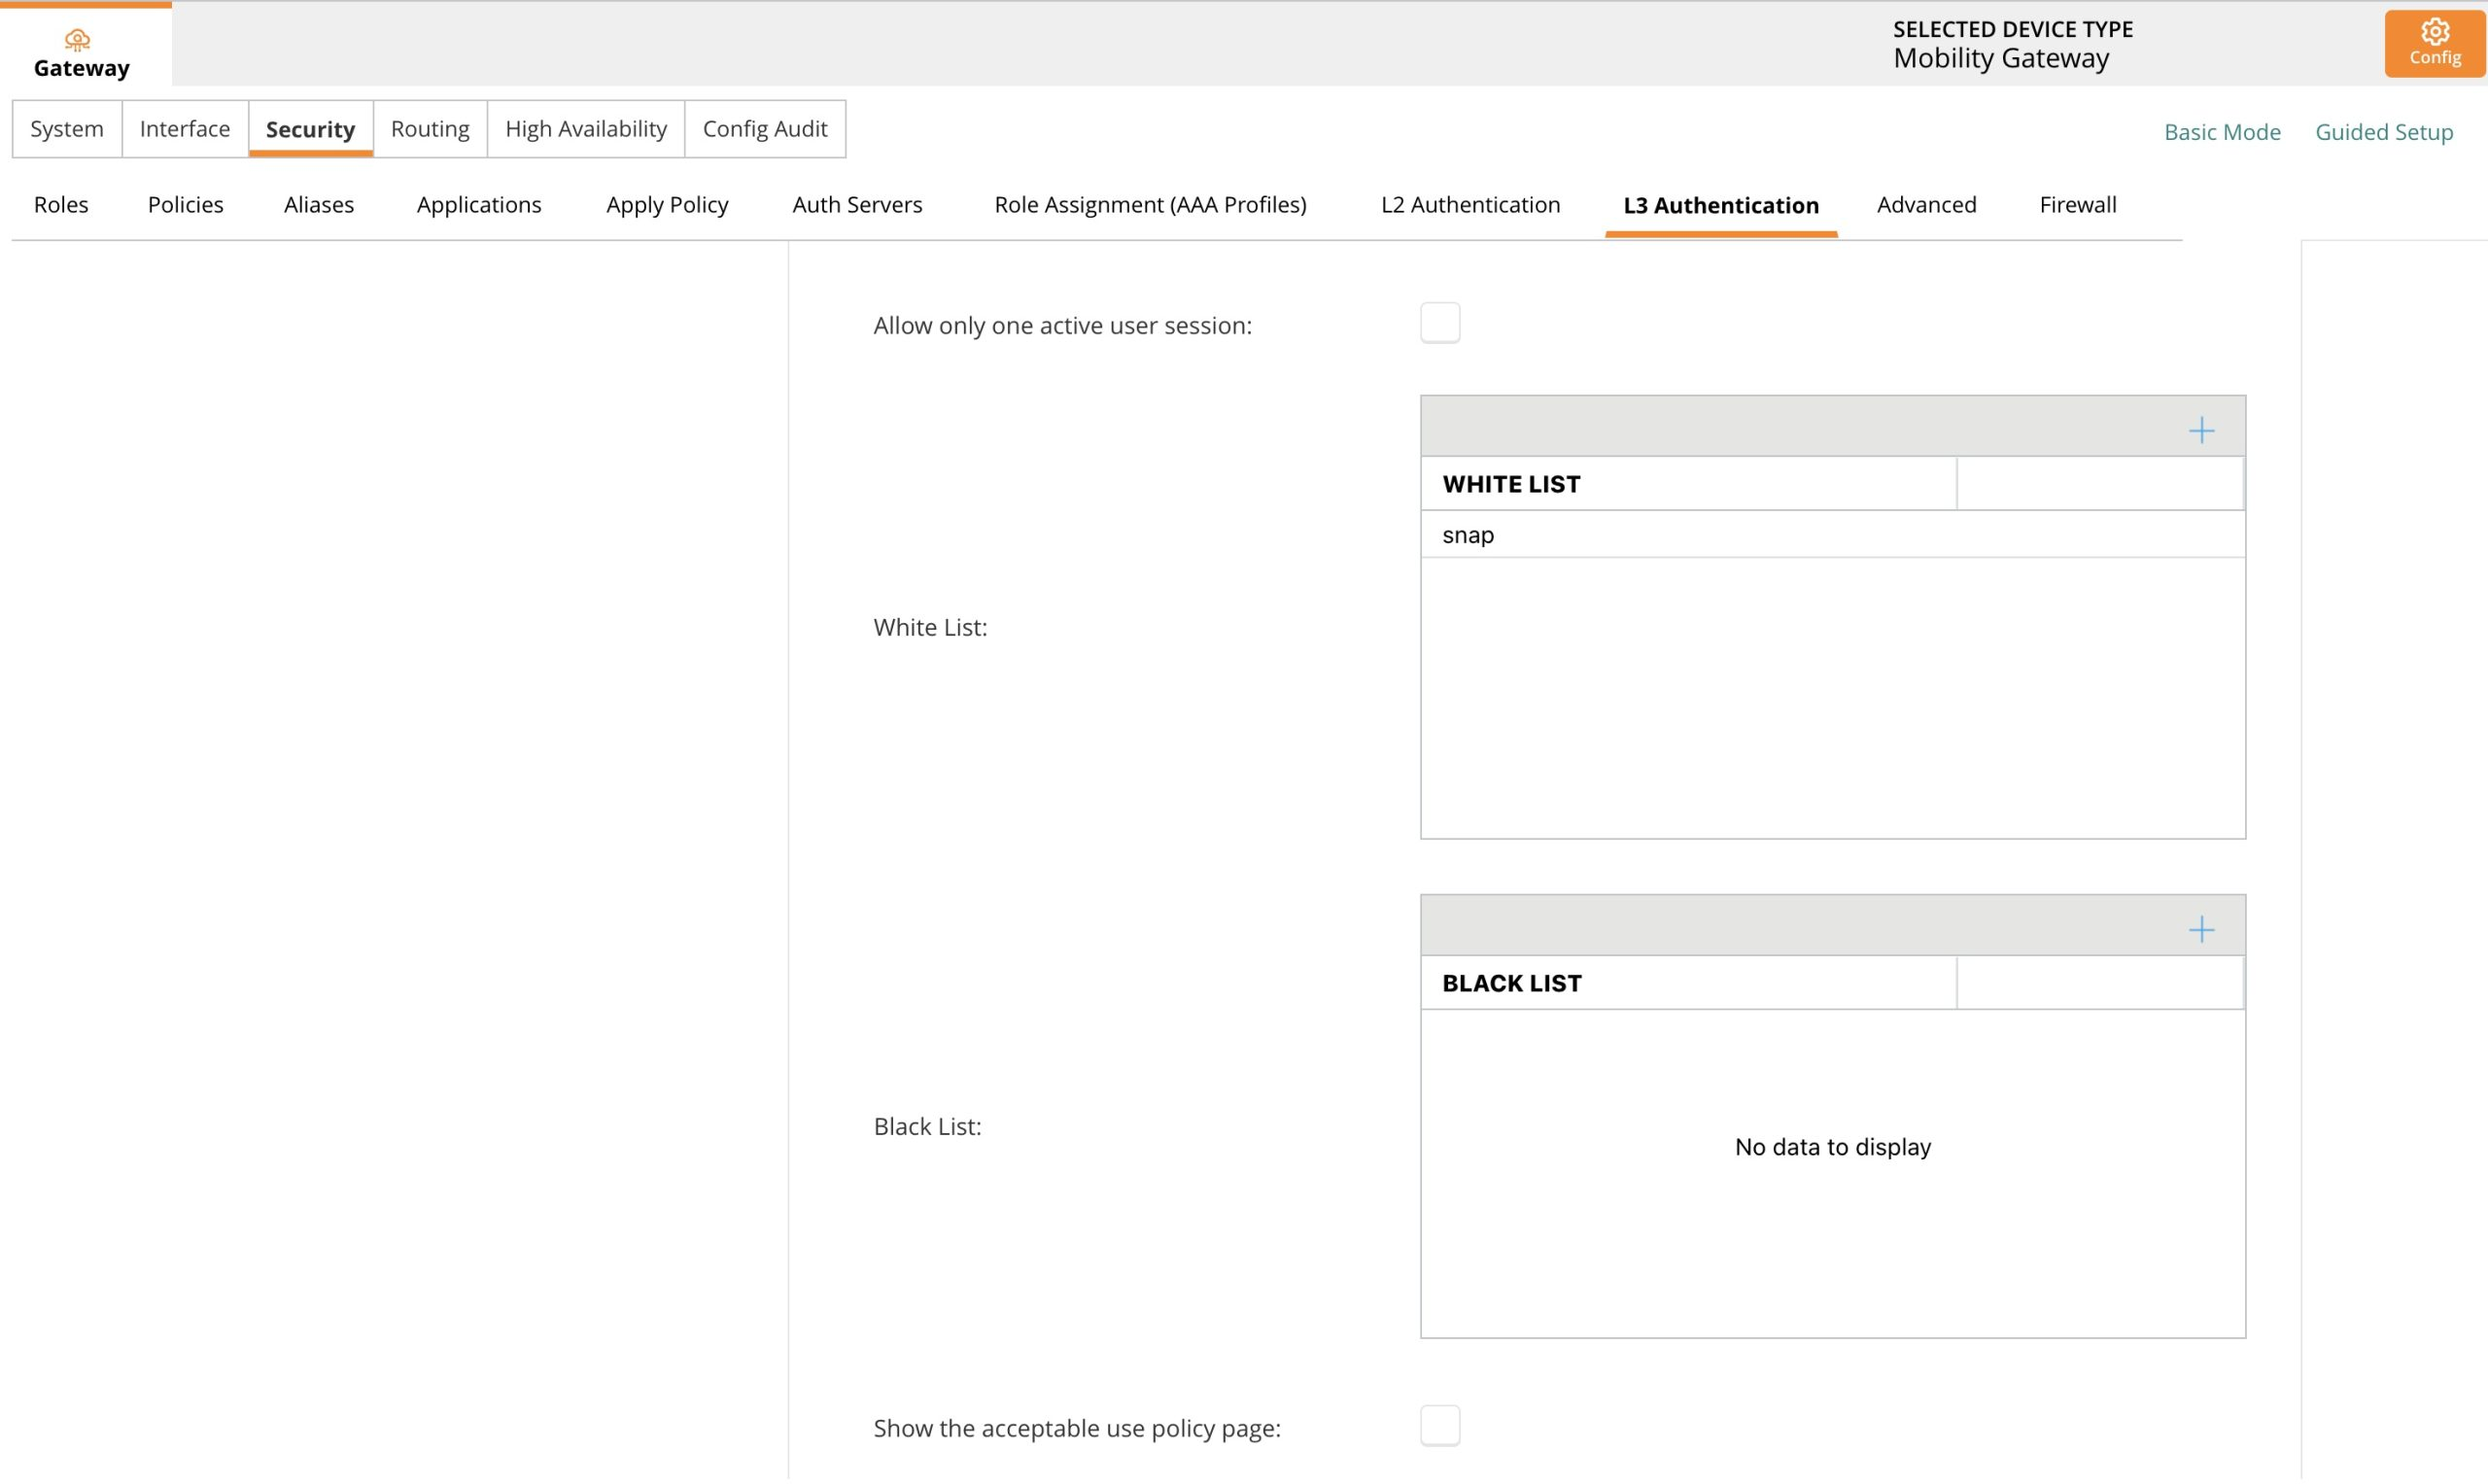
Navigate to Security → L3 Authentication → SNAP and ensure the settings appear correctly. 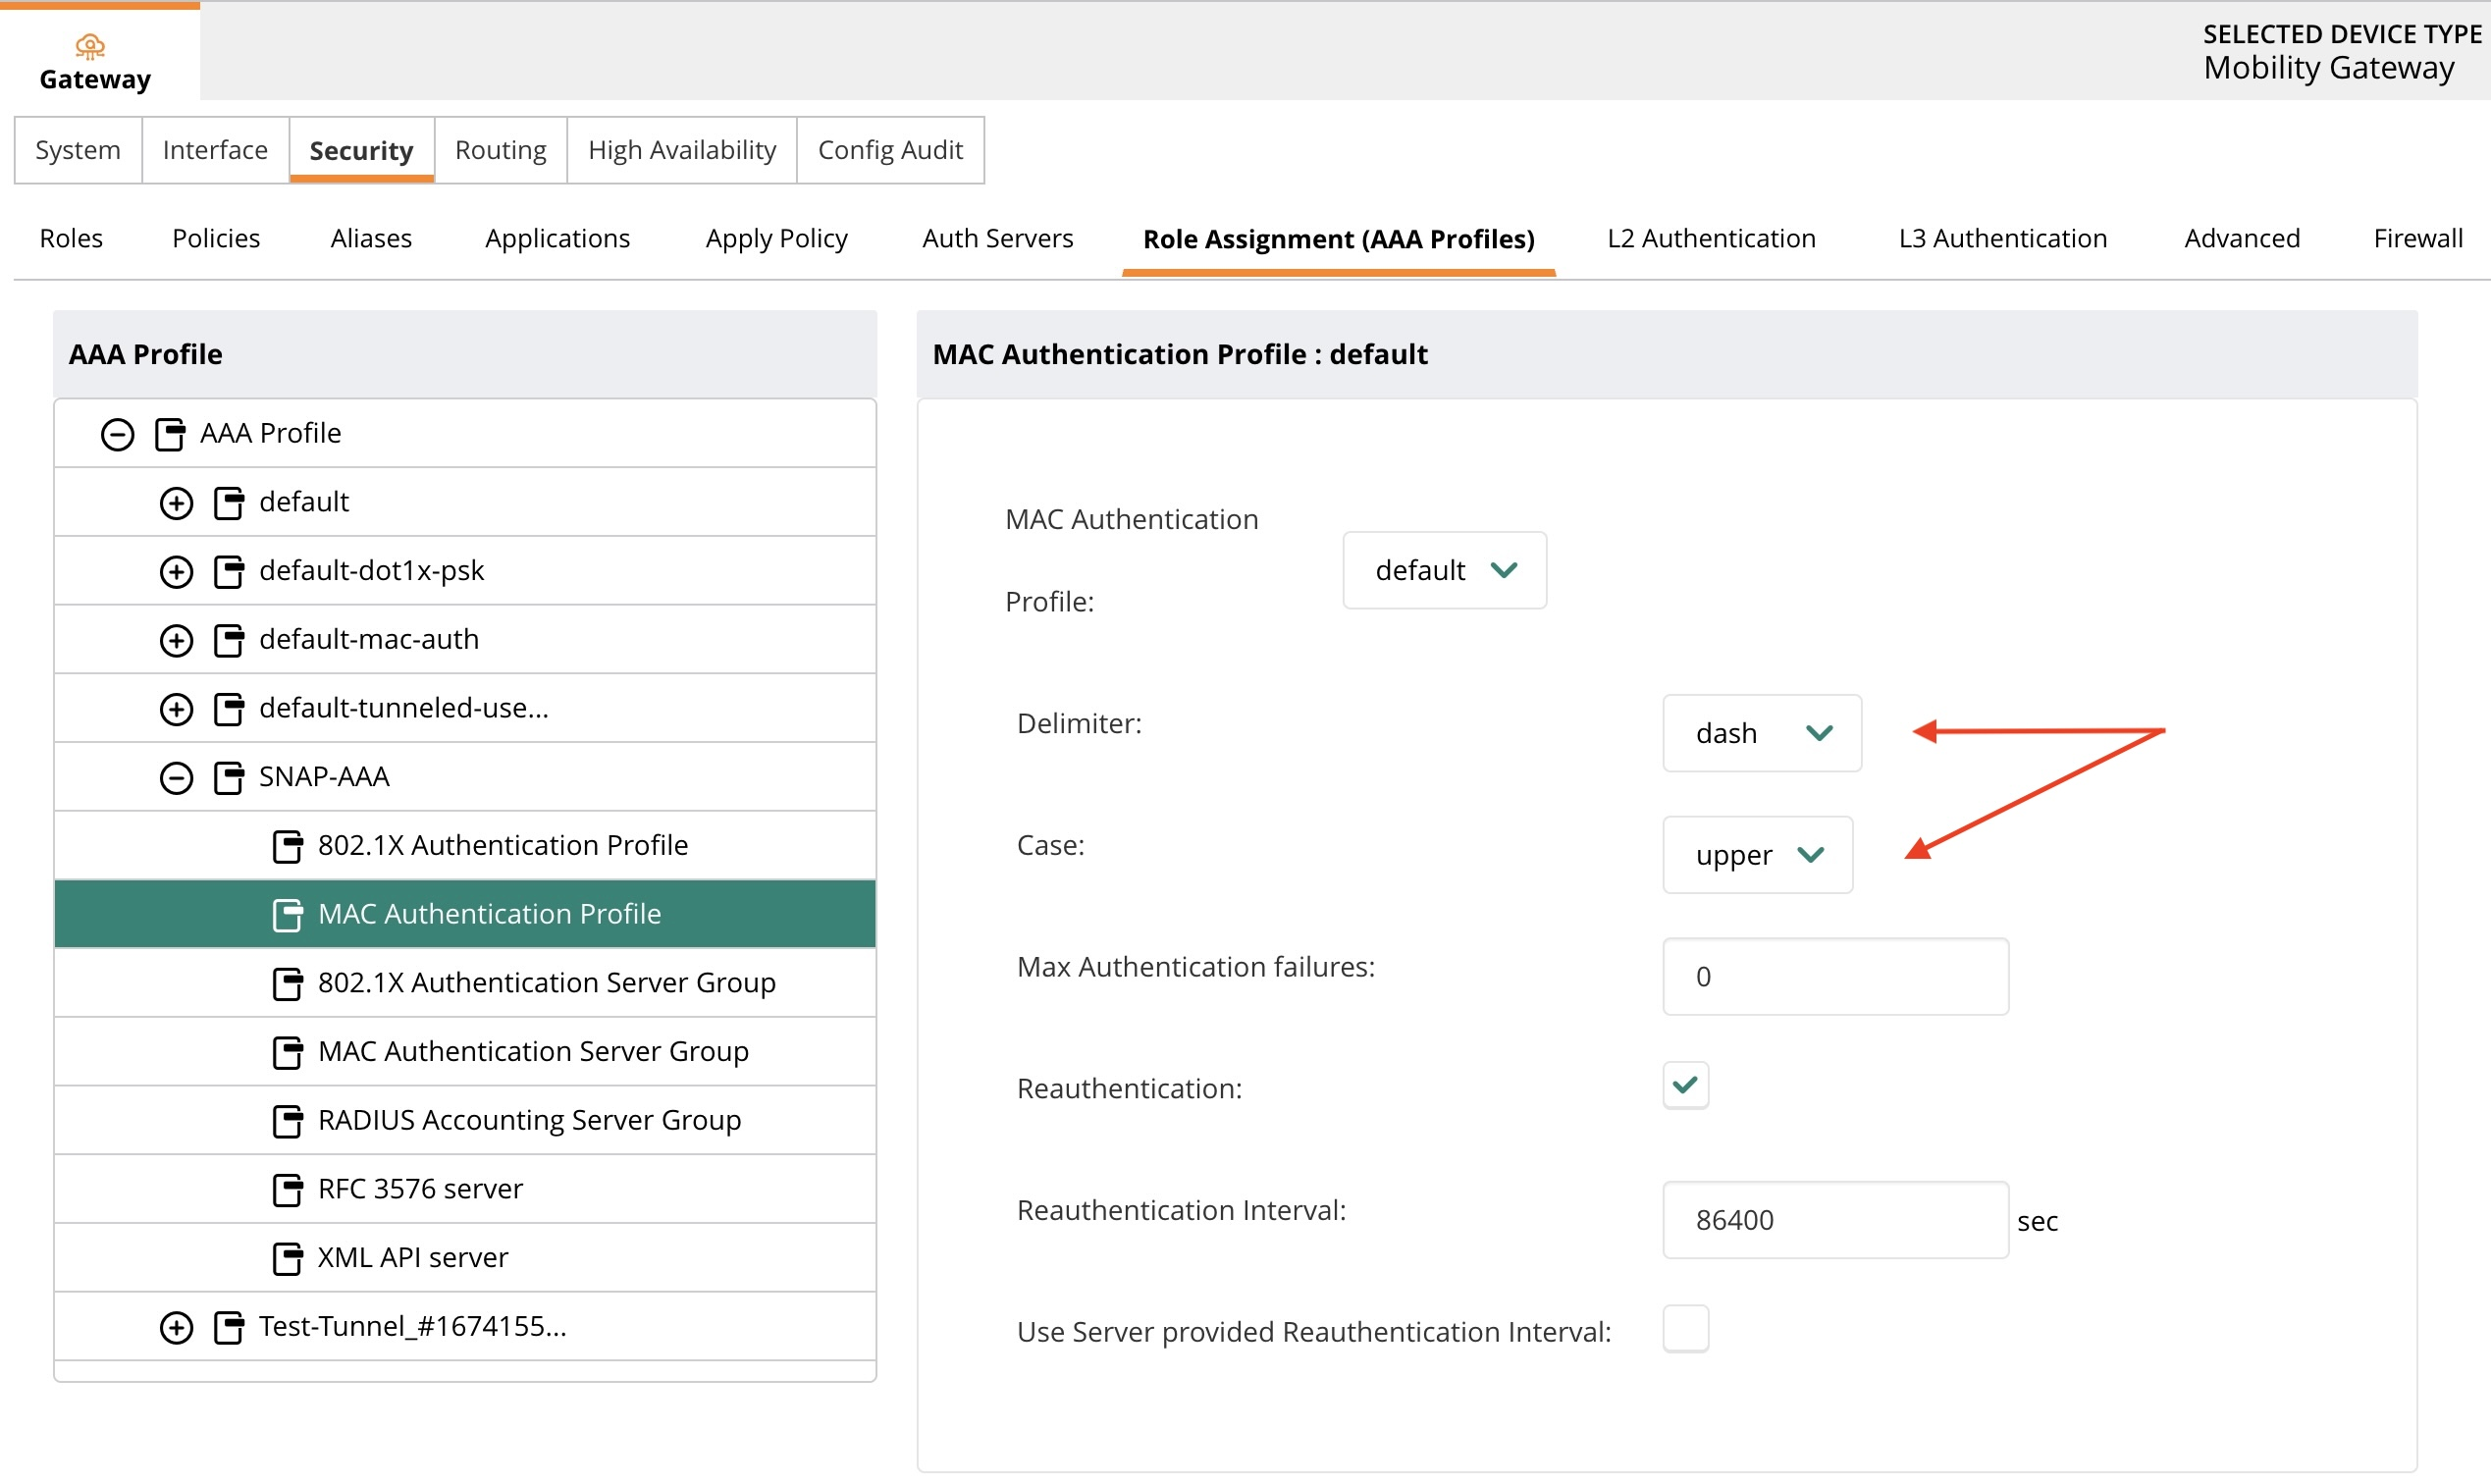
XML API Server
Navigate to Security → L3 Authentication → SNAP and ensure the XML server is added. 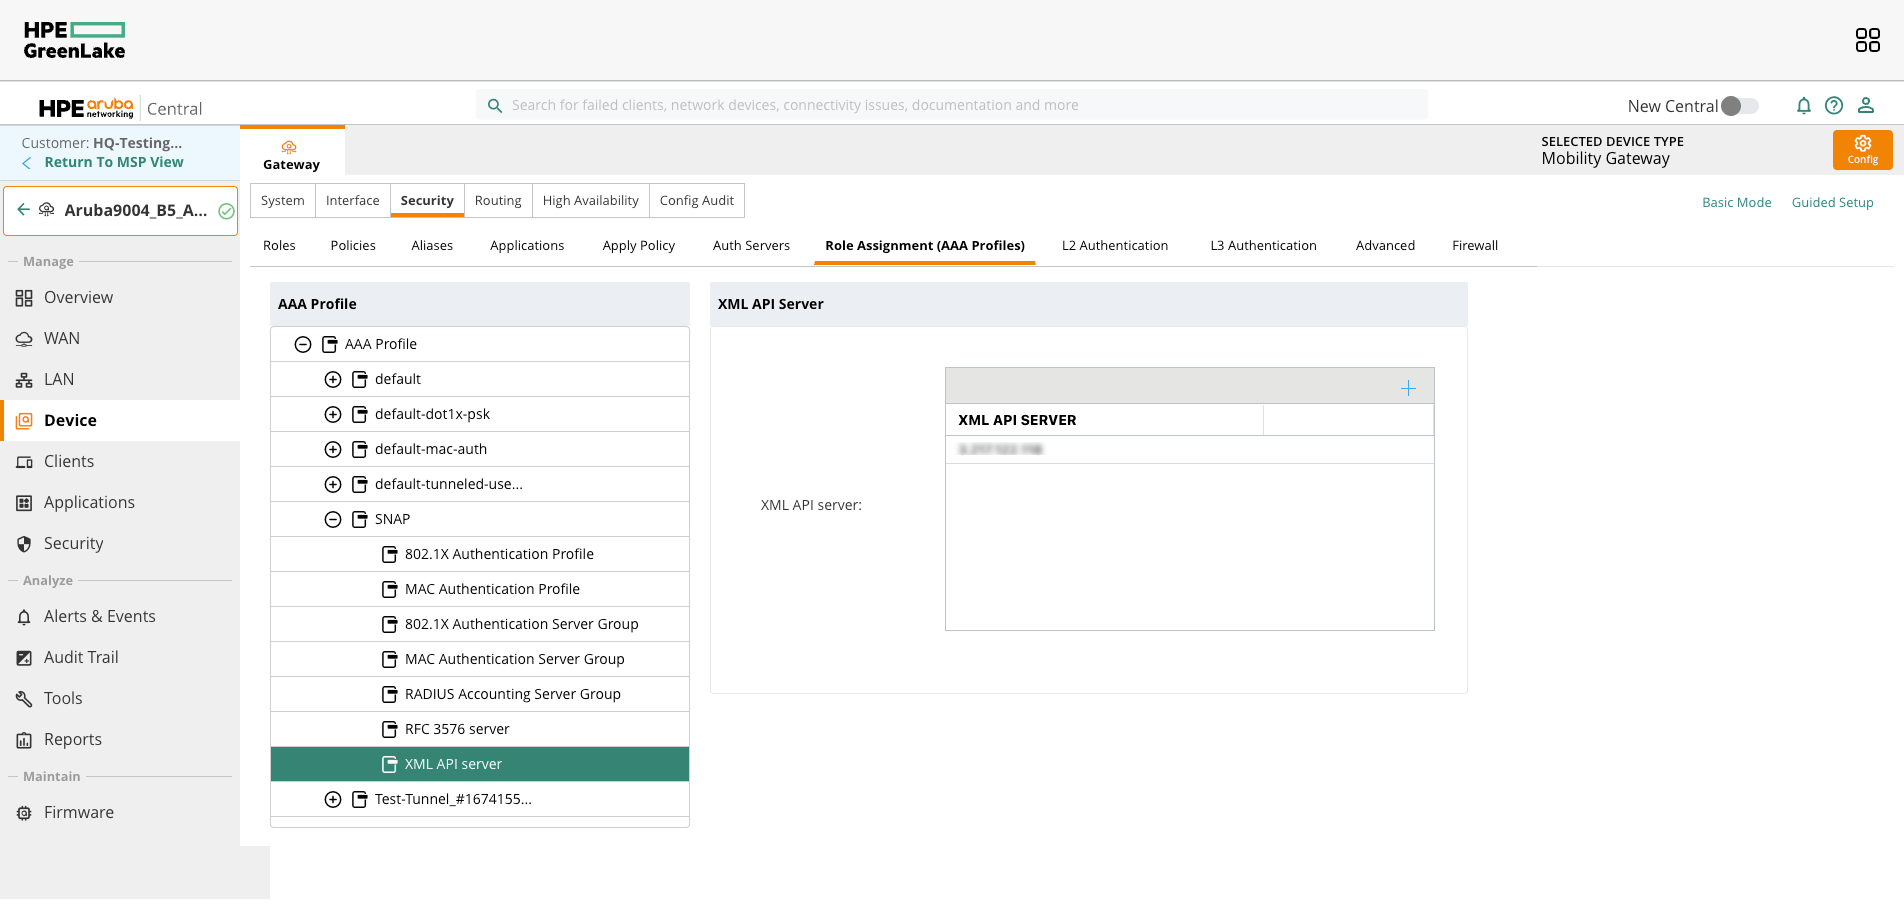
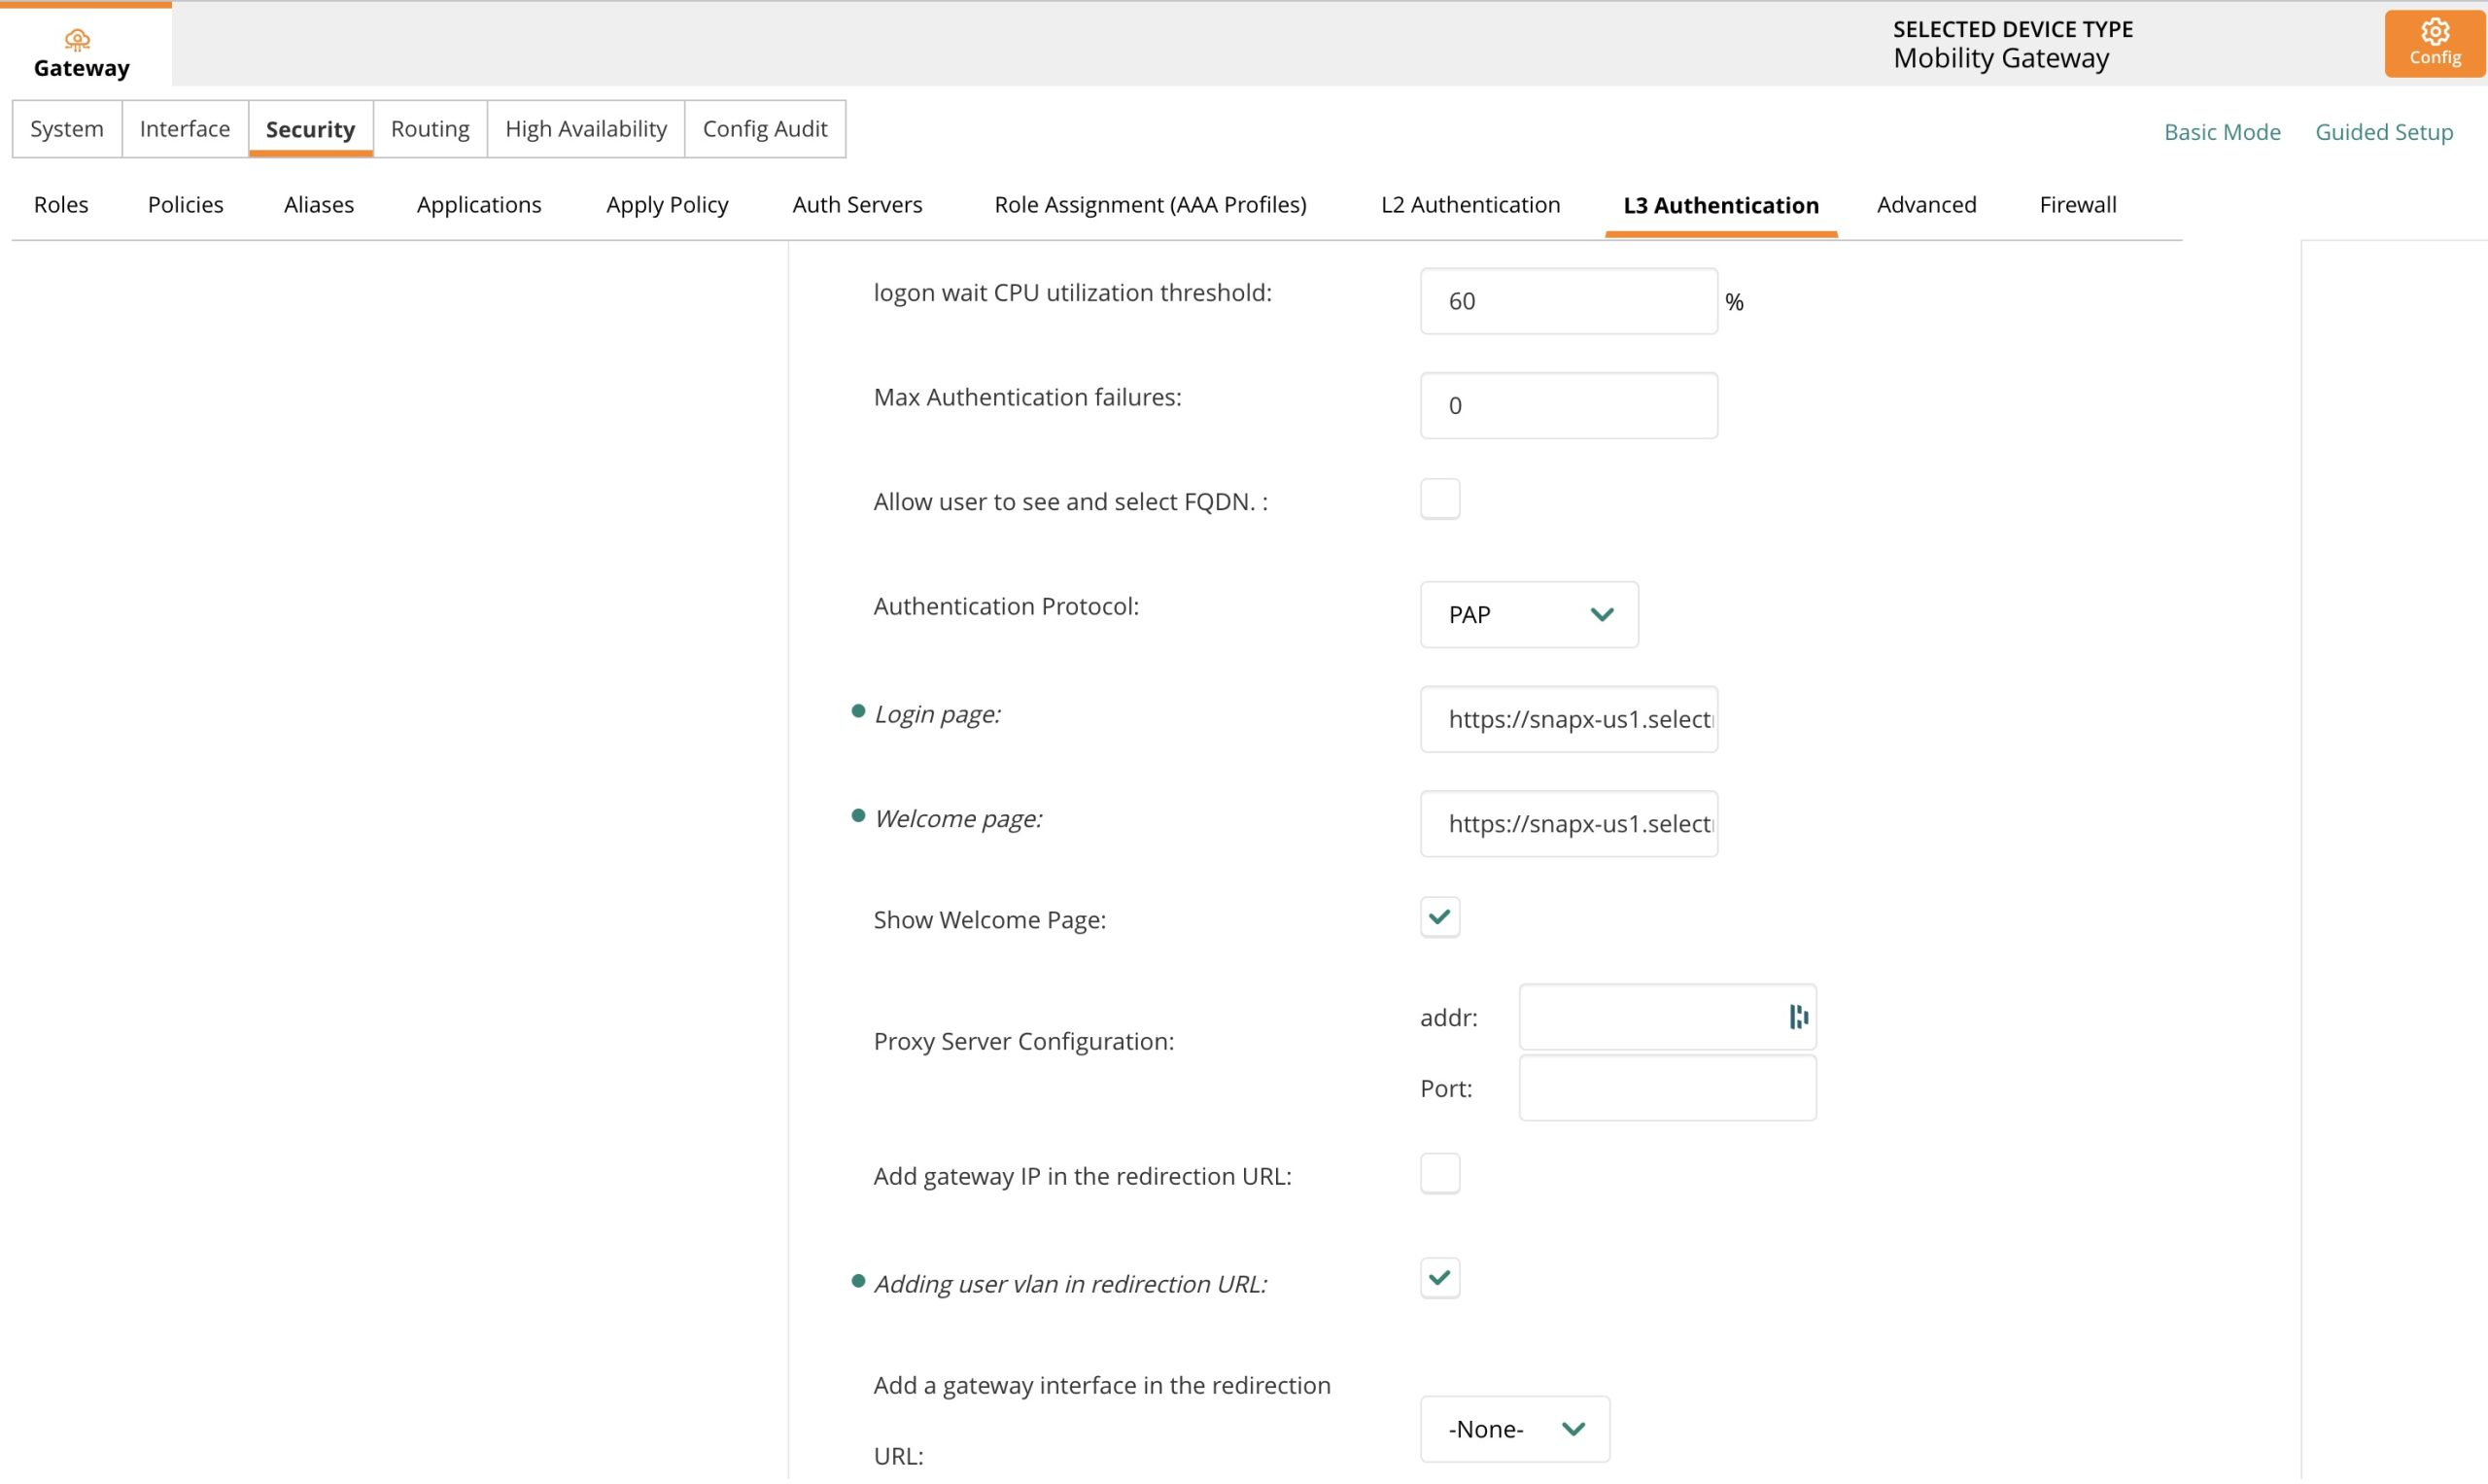
Configure Captive Portal
Navigate to Security → L3 Authentication → Captive Portal Authentication Profile
Create SNAP Profile and add the captive portal URL given to you. It should look like:
https://snapx-us1.selectnetworx.com/guests/welcome/{PORTAL_ID}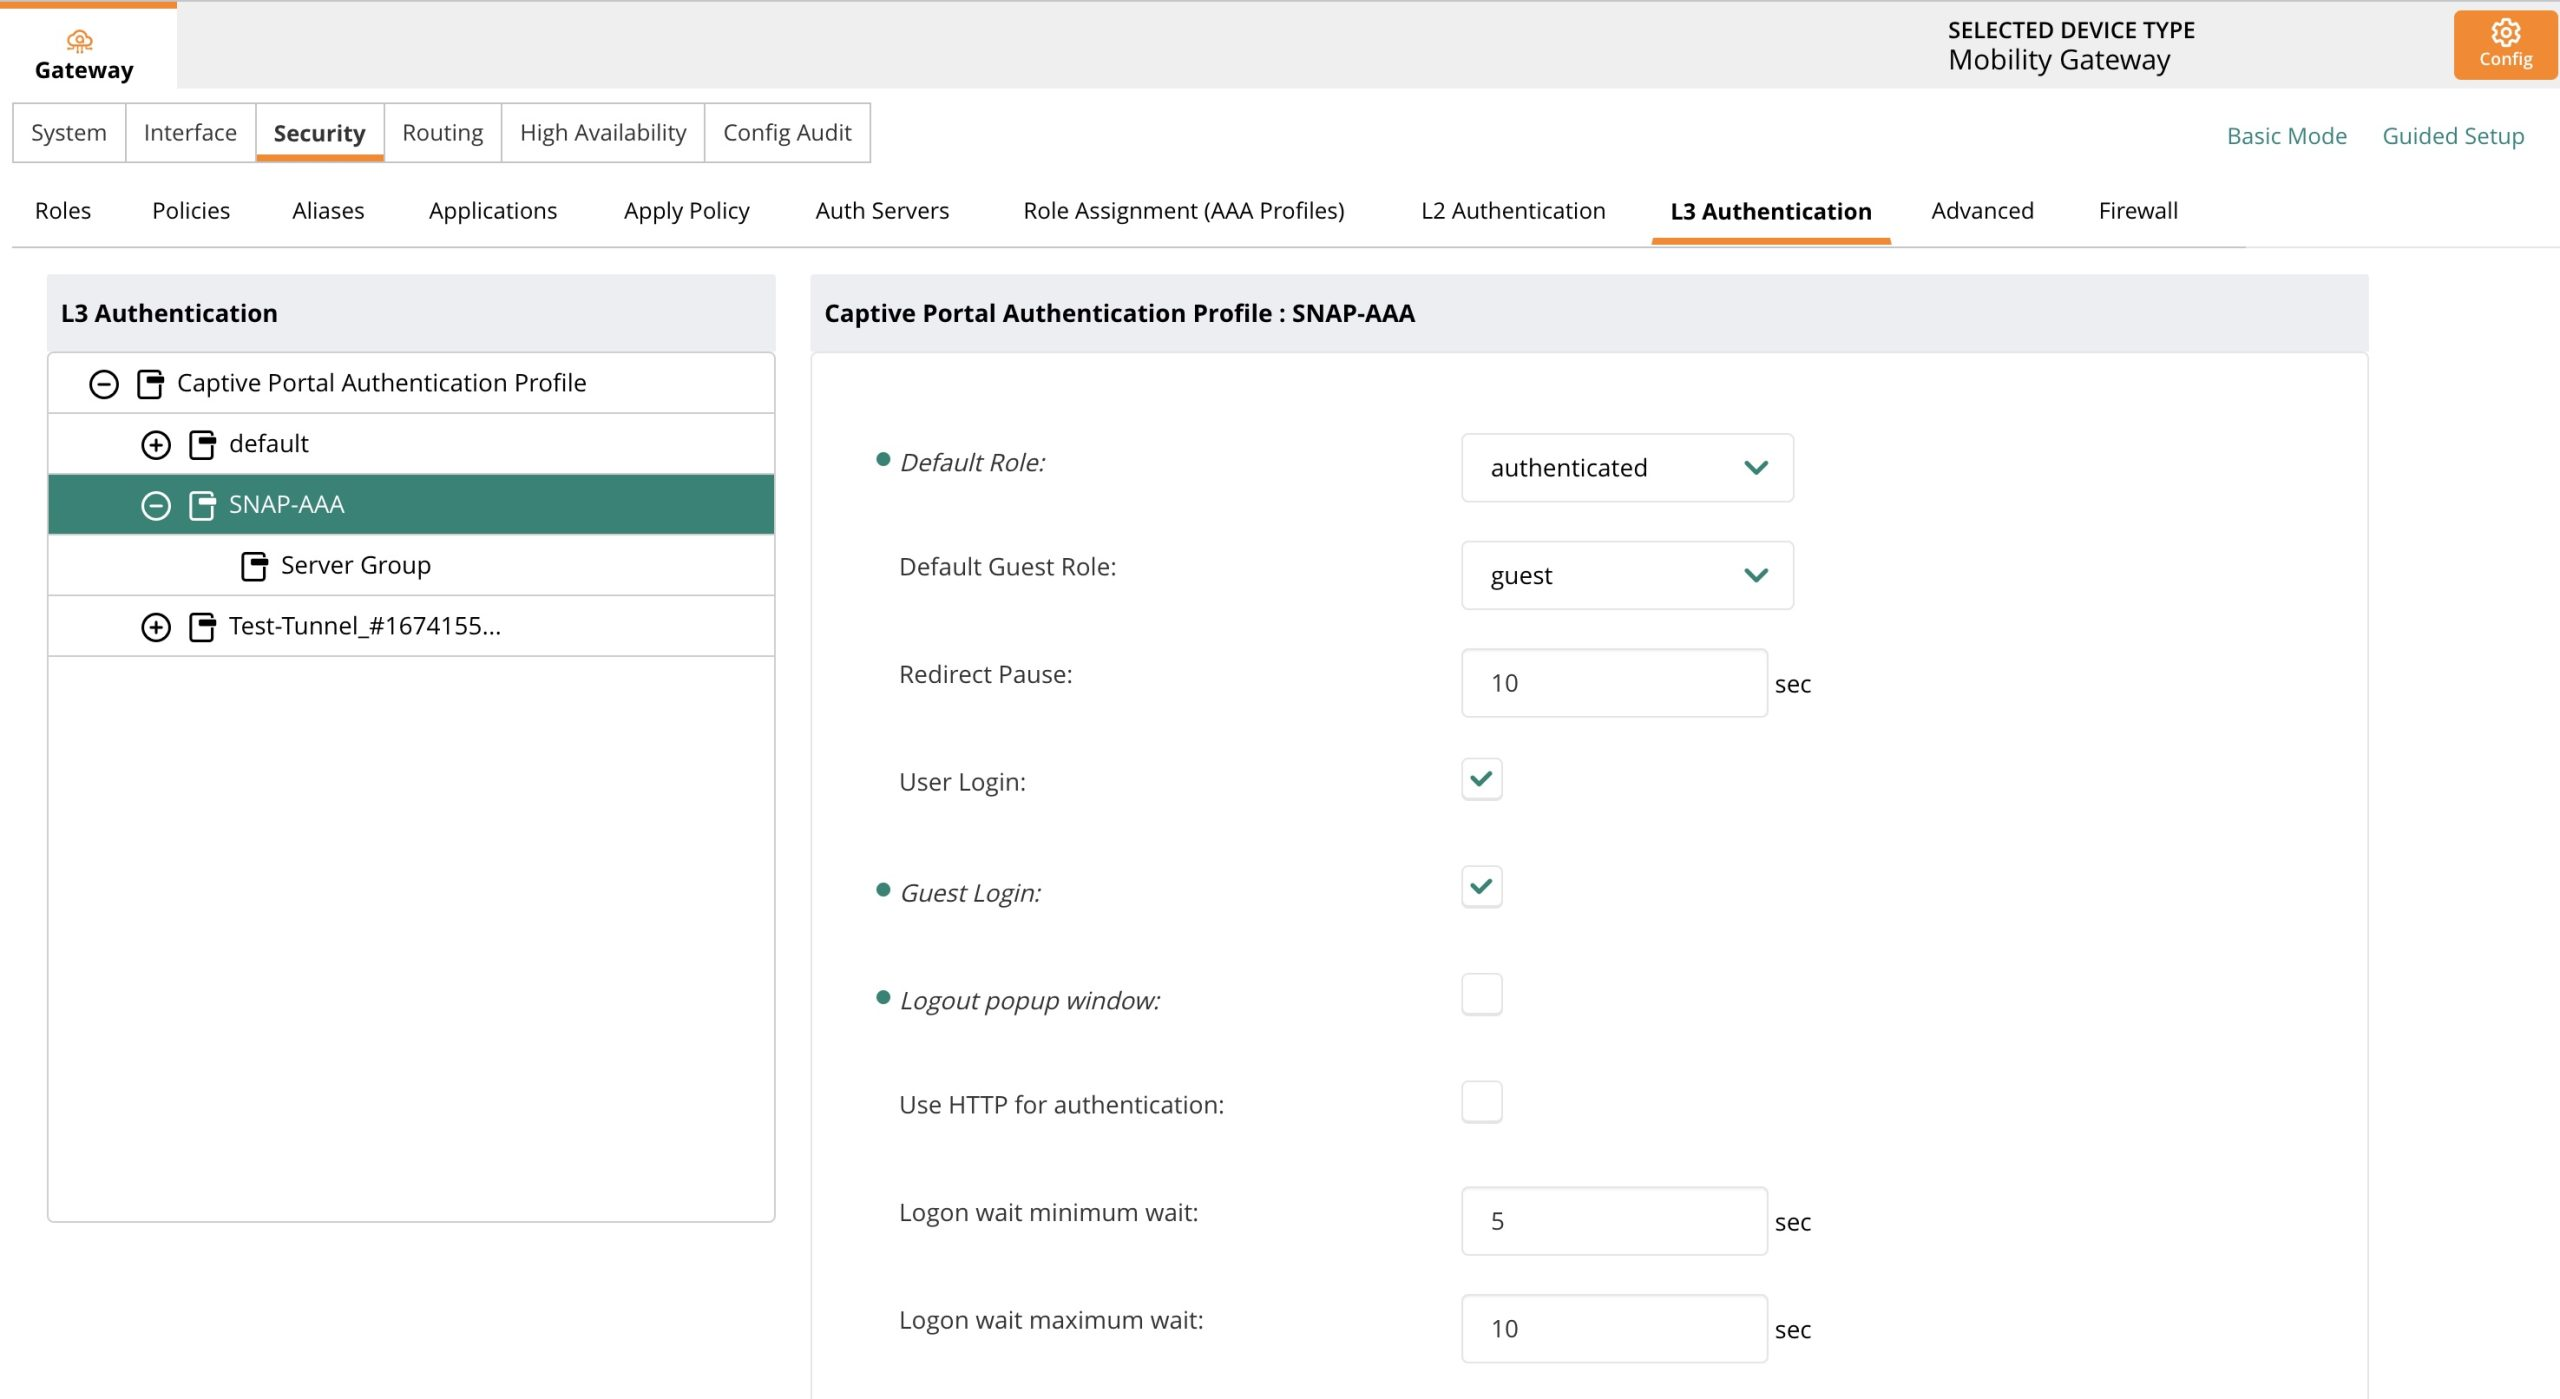
Configure Whitelist Alias
- Navigate to Security → Alias
- Create new alias labeled "snap"
- Add two "name" values:
*.selectnetworx.com*.awsamazon.com
Navigate to Security → L3 Authentication → snap and scroll to the White List section. Add the newly created alias to the white list. 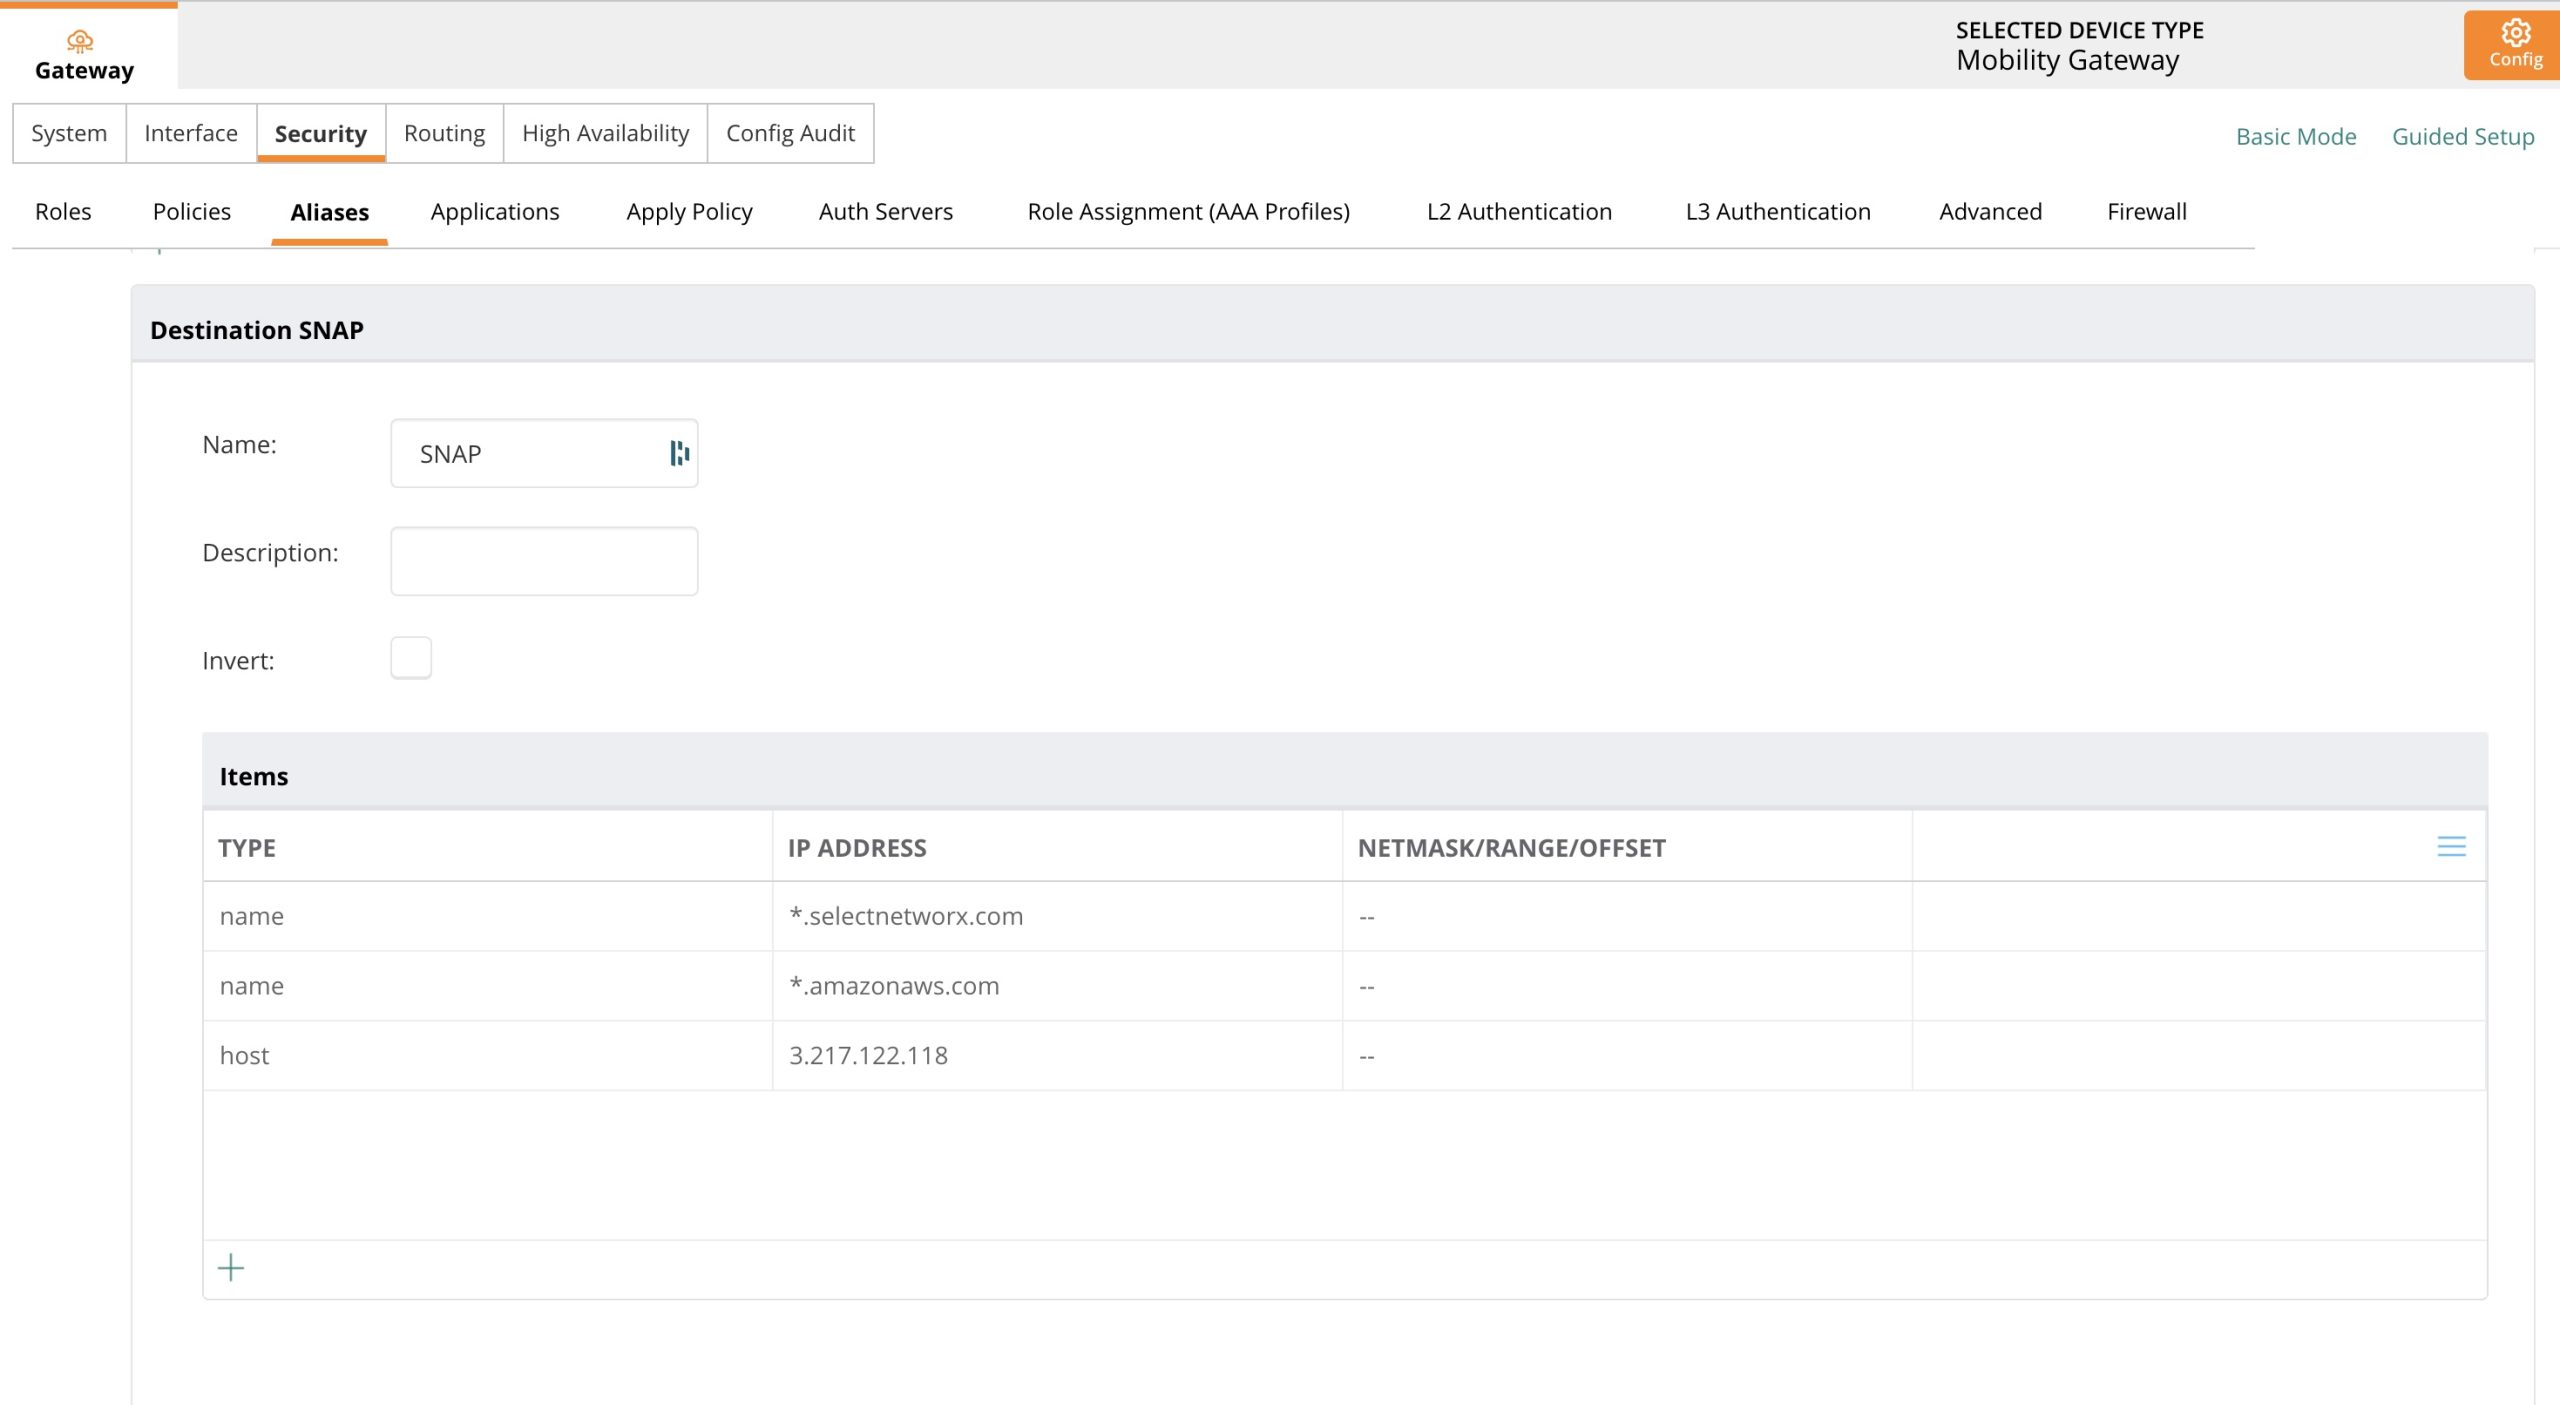
Update the Role
Navigate to Security → Roles
- Select the logon role
- Select Authentication from the menu below
- Select More
- Make sure the Captive portal profile is set to
SNAP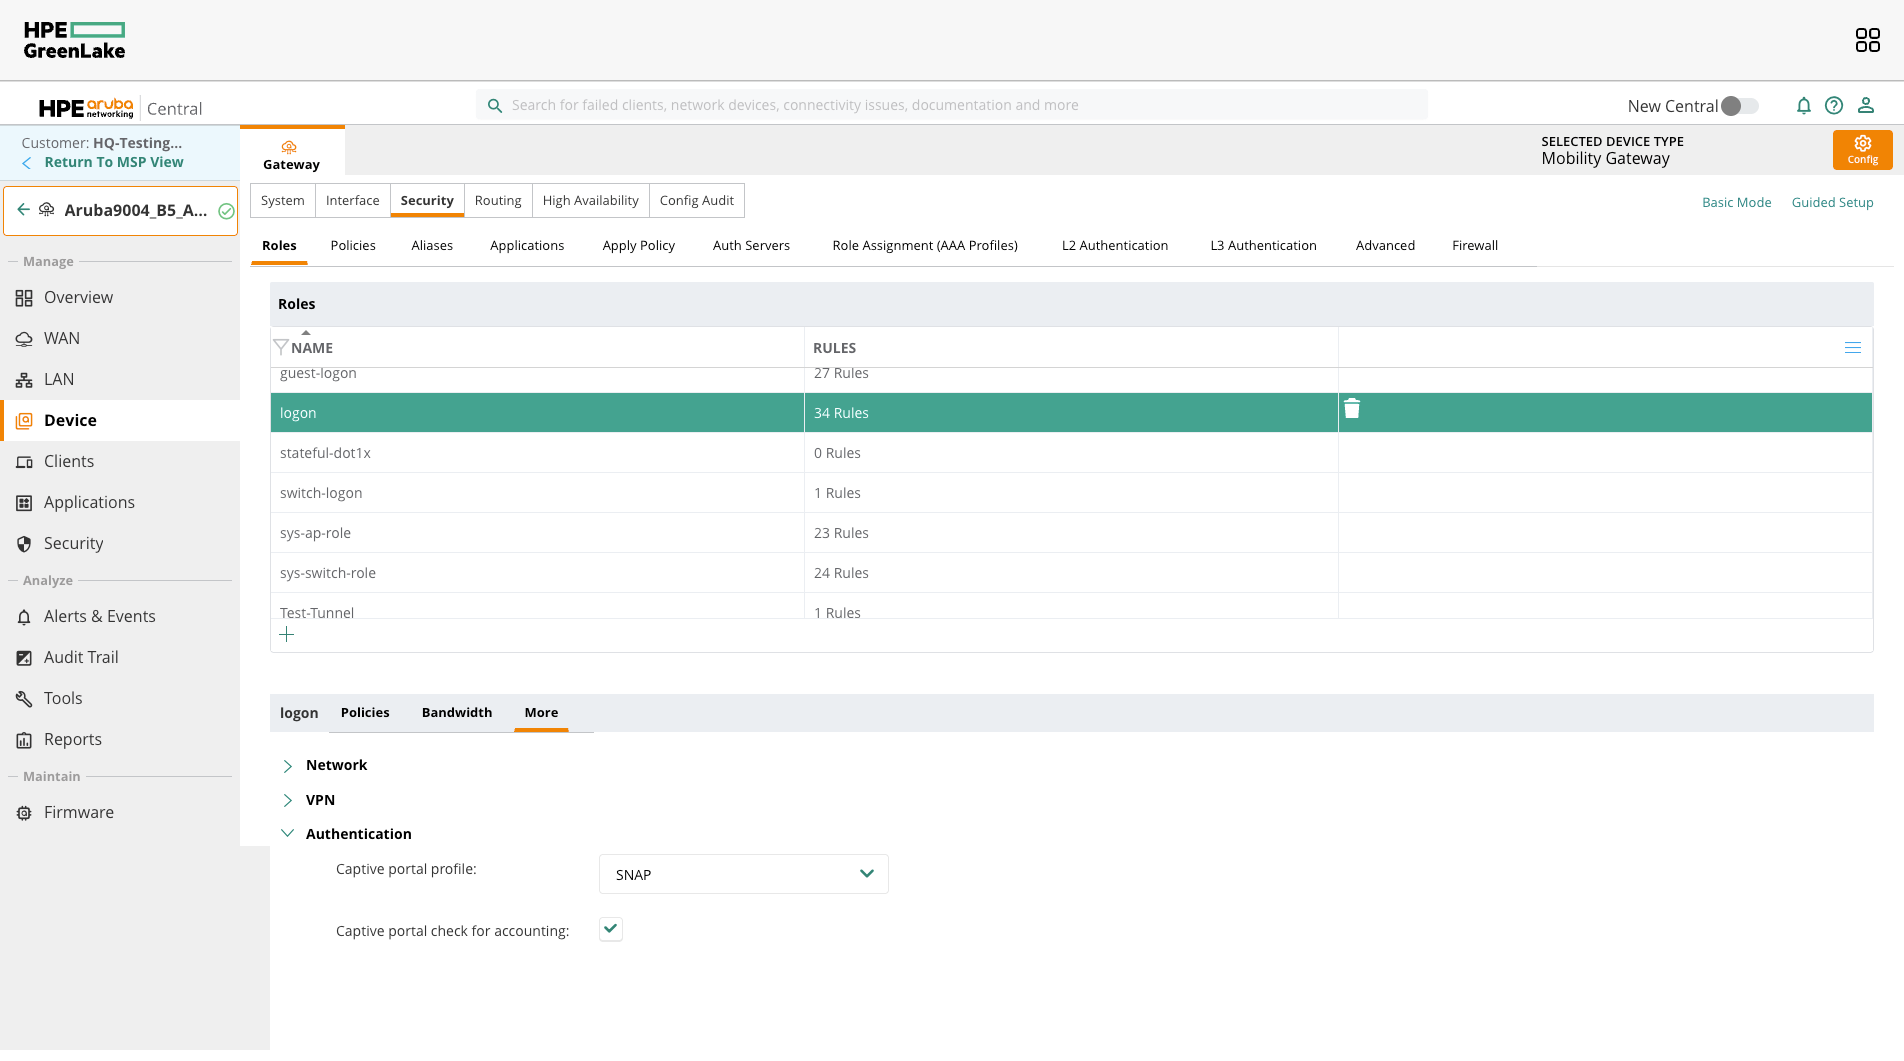
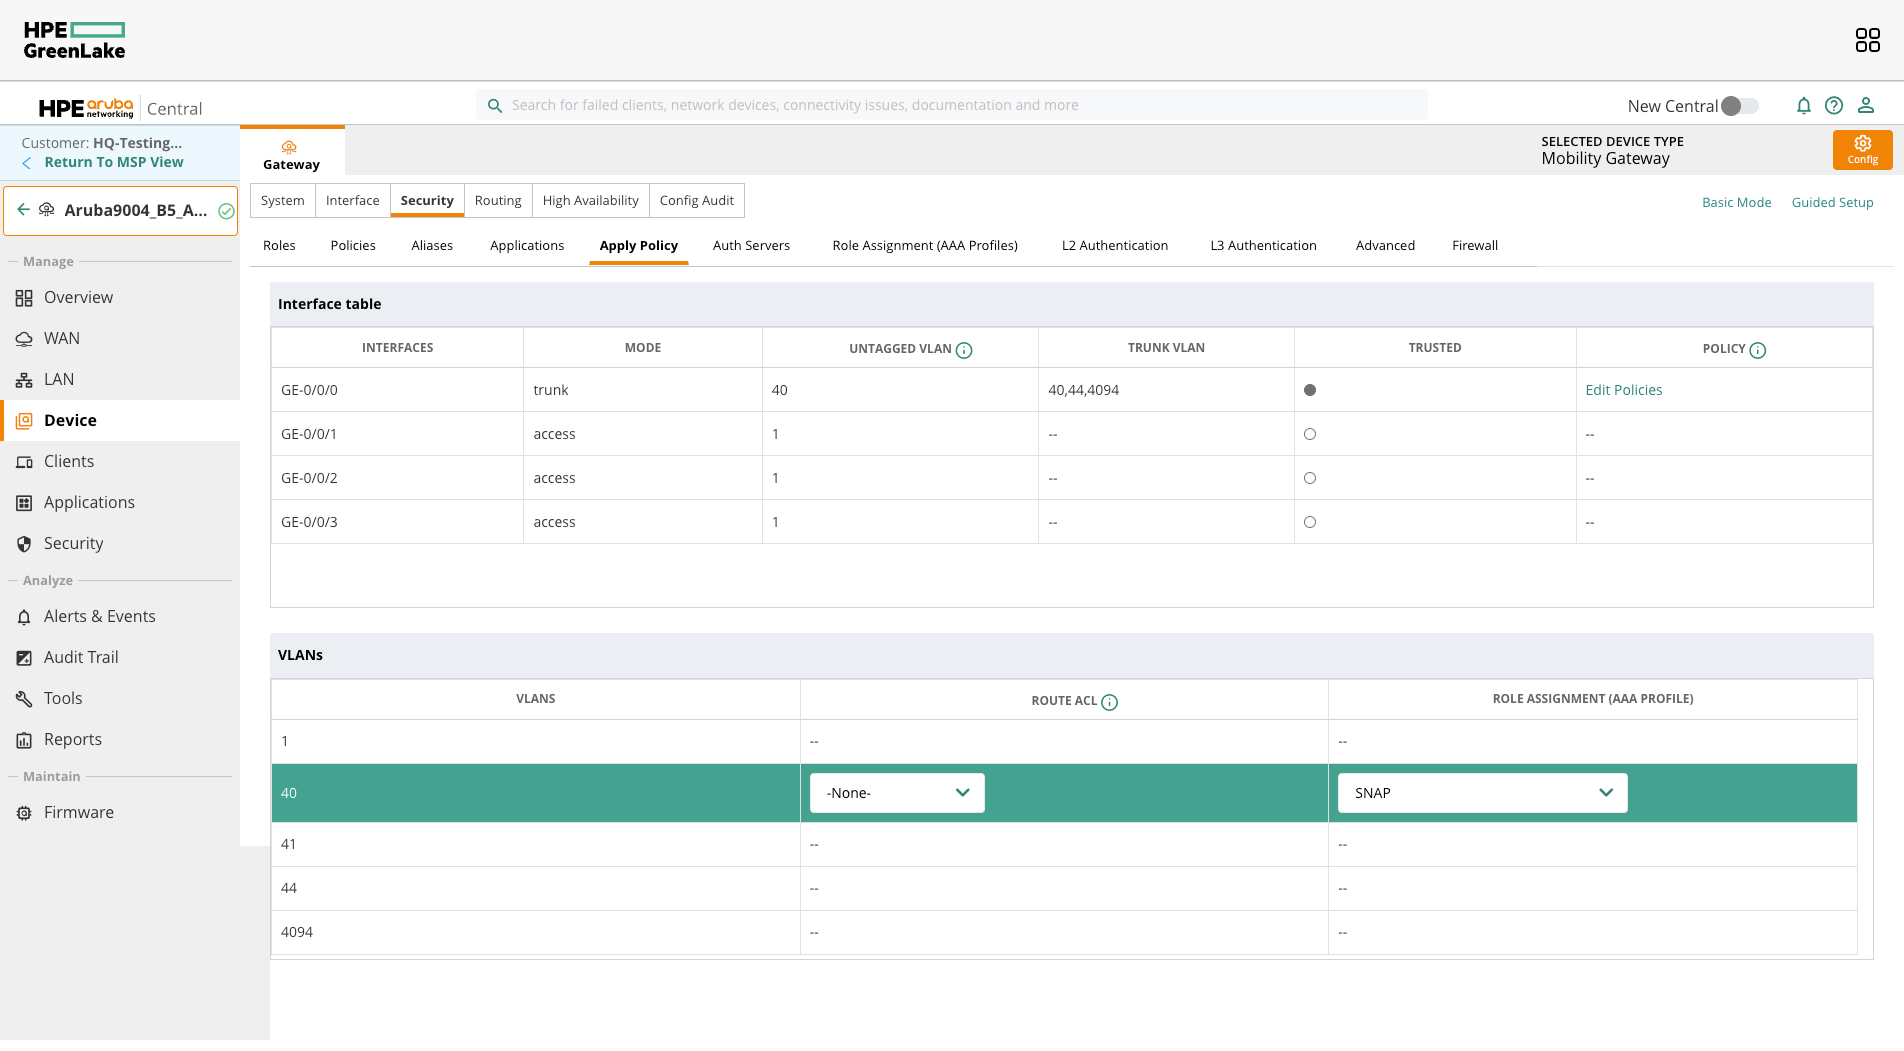
Apply Security Policy
Navigate to Security → Apply Policy
- Select the INTERFACE that has the guest network VLAN
- Select the VLAN for the guest network
- Assign the SNAP role to it
Clear Authenticated Device from Aruba
- Login to Aruba device via SSH using Putty
- To list all the connected devices, run:
show user - To delete the device, note down the IP Address of the device and run:
aaa user delete 192.168.50.3
Net Destination / Whitelist
Before a user is authenticated, the firewall prohibits most communication to the Internet. For users to reach the SNAPx captive portal servers and any other web site or content that the property may want users to access before they login needs to be added to the whitelist.
Consult Select Networx and the property to correctly build the whitelist. Net Destinations can include IP addresses, ranges, hostnames, etc.
User Authentication
Captive Portal Profile
Create a captive portal profile that defines the external SNAP captive portal page and authentication options. In the example below, we will:
- Place all authenticated users in the "authenticated" role by default
- Use the RADIUS server that is in the "SNAP" server group
- Send users to the specific login page
- Insert information in the redirect URL for SNAP
- Apply the whitelist
Logon Role
Create an initial logon role that is assigned to a specific authentication profile. This role is applied to all new users who connect where the authentication profile is applied (guest wired VLAN, Virtual AP, etc.).
Different VLANs or SSIDs can have different initial logon roles, providing unique authentication experience for each. In this example, we are using default logon role access-lists (logon-control and captiveportal) that can be modified for required security policies. We also apply the captive-portal profile.
Authentication Profile
Create an authentication profile that can be assigned to wired or wireless users. Here we control how users authenticate:
- Assigns all new users the initial role
- Enables RADIUS accounting
- Defines the external XML API servers to use
Applying the Roles to Users
The last thing we want to do is enable guest authentication on the guest VLAN.
Untrusted Guest VLAN
We need to set the guest VLAN as untrusted. We can do this by specifying on the interface that only VLAN 1 (or whatever the management VLAN is) should be trusted.