Basic Site Configuration
Create a site as normal filling in all required fields. After guest networking services is enabled, change the "Gateway Type" to "SolutionIP" and "Authentication Method" to "RADIUS"
Add your device as normal selecting the type "Gateway", vendor "SolutionIP" and model to "SnapX Gateway".
It is CRITICAL that you ensure the username and password stored in snap for this device is the same username and password used to log in to the SolutionIP Configuration / Administration tool, if these credentials are not correct it WILL NOT WORK with SNAPx and authentications will fail.
Basic Device Configuration
Prerequisites
- VMWare Virtual networking configured.
- Installed and *licensed SolIP instance with basic networking configuration.
- Port 4431 accessible and directed to the SolIP Instance.
Enabling RADIUS
Navigate to Global → Authorization, Accounting & Billing → Payment Methods.
Ensure RADIUS Authentication is Enabled 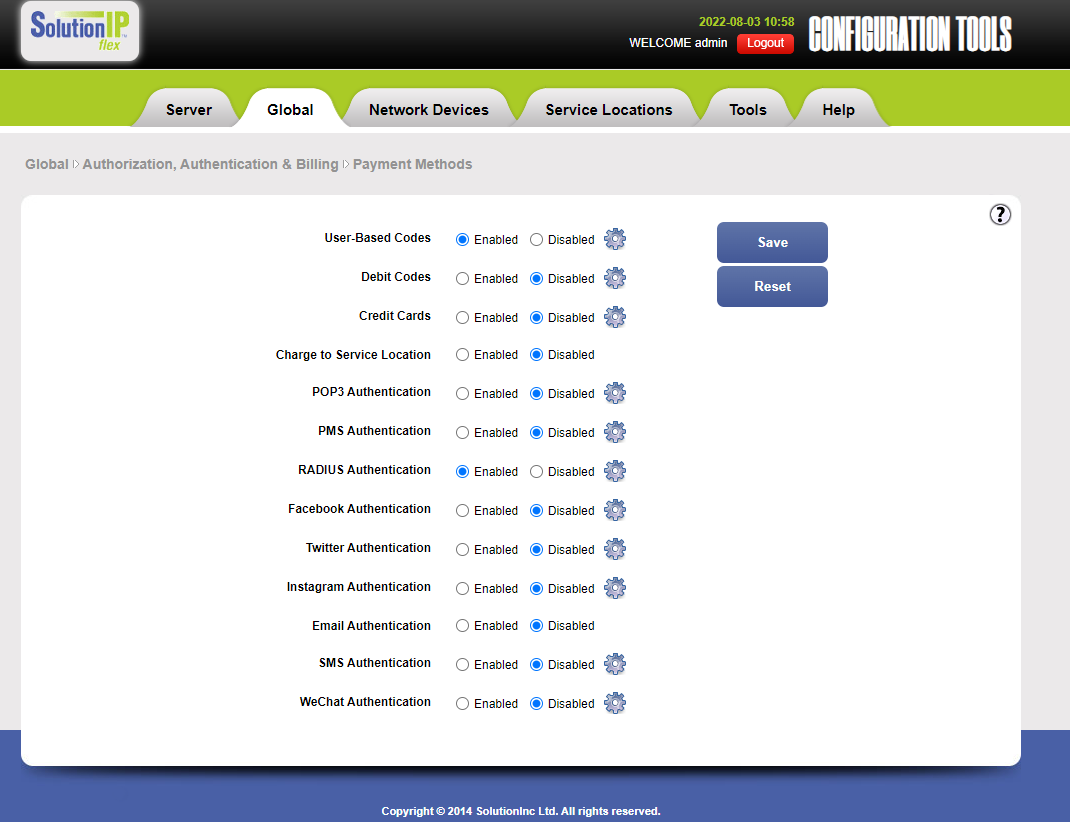
Radius Config
Load the Configuration Tool and navigate to Global → Authorization, Accounting & Billing → RADIUS → Browse Radius Providers.
Create a new provider with the following details
- Name : SNAP_AWS
- Update Interval : 900
- RADIUS Protocol : PAP
- Shared Secret : [SNAP_AWS_SECRET]
- Default Provider : No
- iPass Provider : No
- Auto-Reregistration : No
Save this provider and navigate to Global → Authorization, Accounting & Billing → RADIUS → Browse Radius Servers. 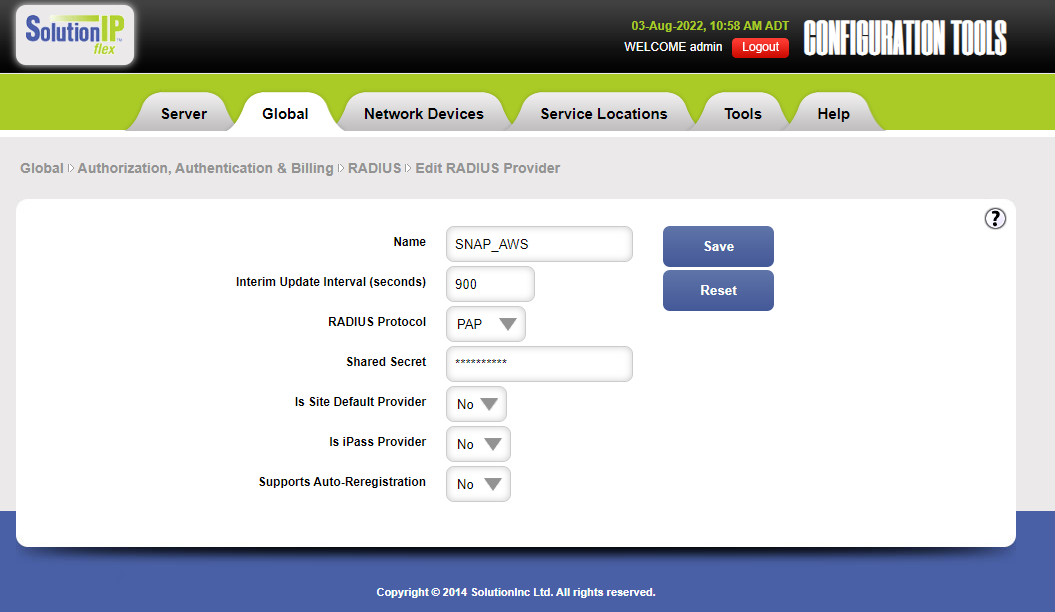
Create two new RADIUS servers with the following details
Server 1
- RADIUS Provider : SNAP_AWS
- Server Type : Authentication
- Host/IP Address : [Egress IP]
- Port : 1812
- Timeout : 10
- Retries : 2

Server 2
- RADIUS Provider : SNAP_AWS
- Server Type : Accounting
- Host/IP Address : [Egress IP]
- Port : 1813
- Timeout : 10
- Retries : 2

Portal Config
Navigate to Service Locations → Browse Service Domains. Click on "Test Domain (default)"
Update the service domain with the following details
- Name : SNAP
- Classification : Guest Rooms
- Registration Landing Page : Global Setting
- Pre Portal Landing Page : Global Setting
- Auto-Register All Users : Disabled
- UAM Roaming Control : No Restriction
- Unregister on RADIUS/UAM Idle Timeout : No
- Limit Free Registrations : Disabled
- Payment Methods : RADIUS
- RADIUS Provider : SNAP_AWS ** Use Custom Registration Page : Yes : https://[YOUR_DOMAIN]/guests/welcome/[PORTAL_ID]?MA=&MM=&UIP=&UI=&WAN=
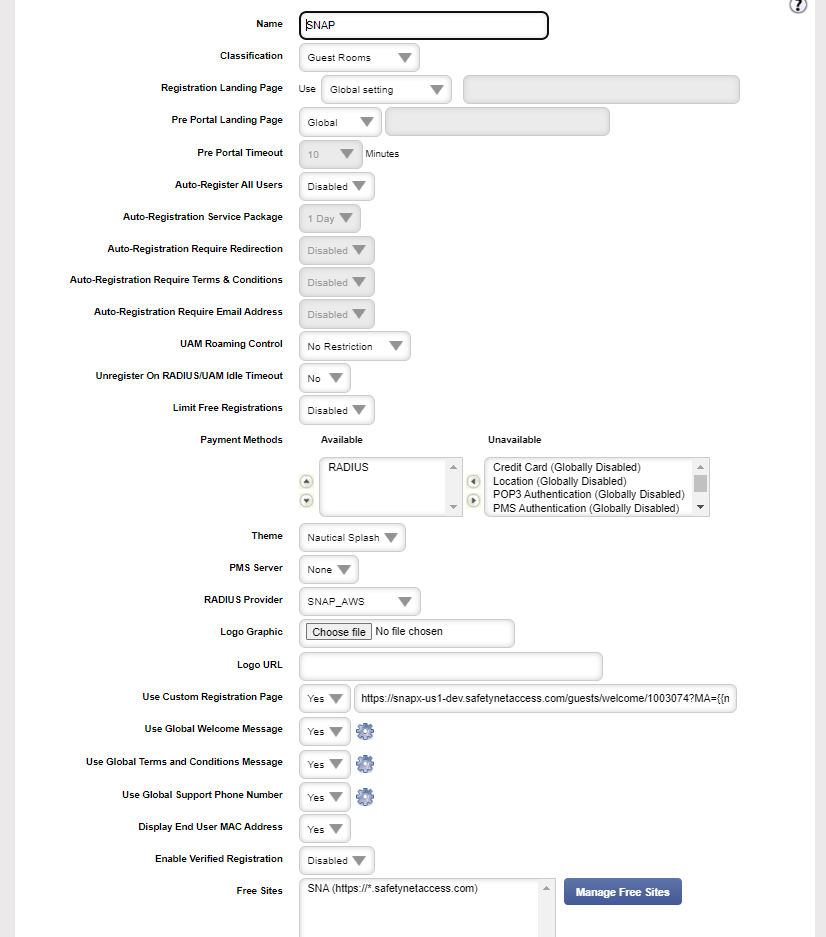
Save this configuration. Find "Free Sites" and "Manage Free Sites". Add a new Free Site with these details
- Site URL : https://*.selectnetworx.com
- Display to User : No
- Site Name : SNAP
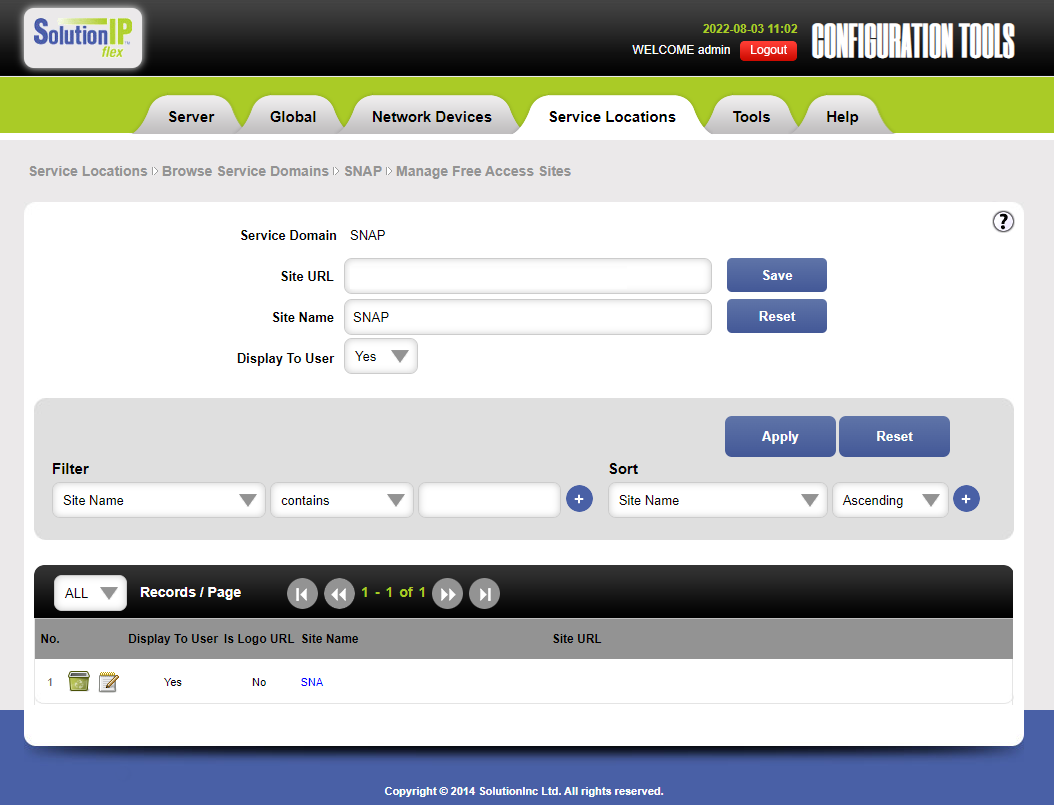
Save this and navigate back to the "SNAP" Service Domain. You should now be able to test your portal.
- If the SolIP instance is not licensed, it will not pass traffic on the subscriber network. It is important that you license the box as the first step. ** This URL uses variables accessible to us such as and . With the UI and WAN parameters, we require these to be the WAN IP of the network itself. If the gateway's WAN interface is not set to the WAN IP of the site, MUST be replaced manually with the WAN IP
For example. A site with the IP 80.189.219.22, the SolutionIP instance is behind Router X and is assigned the internal IP of 10.10.11.9, in this configuration, we must manually enter 80.189.219.22 as the value UI and WAN parameters.
A site with the IP of 80.189.219.22 with the SolIP instance's WAN interface set as 80.189.219.22, you will not need to manually enter the WAN IP.